 Pin It
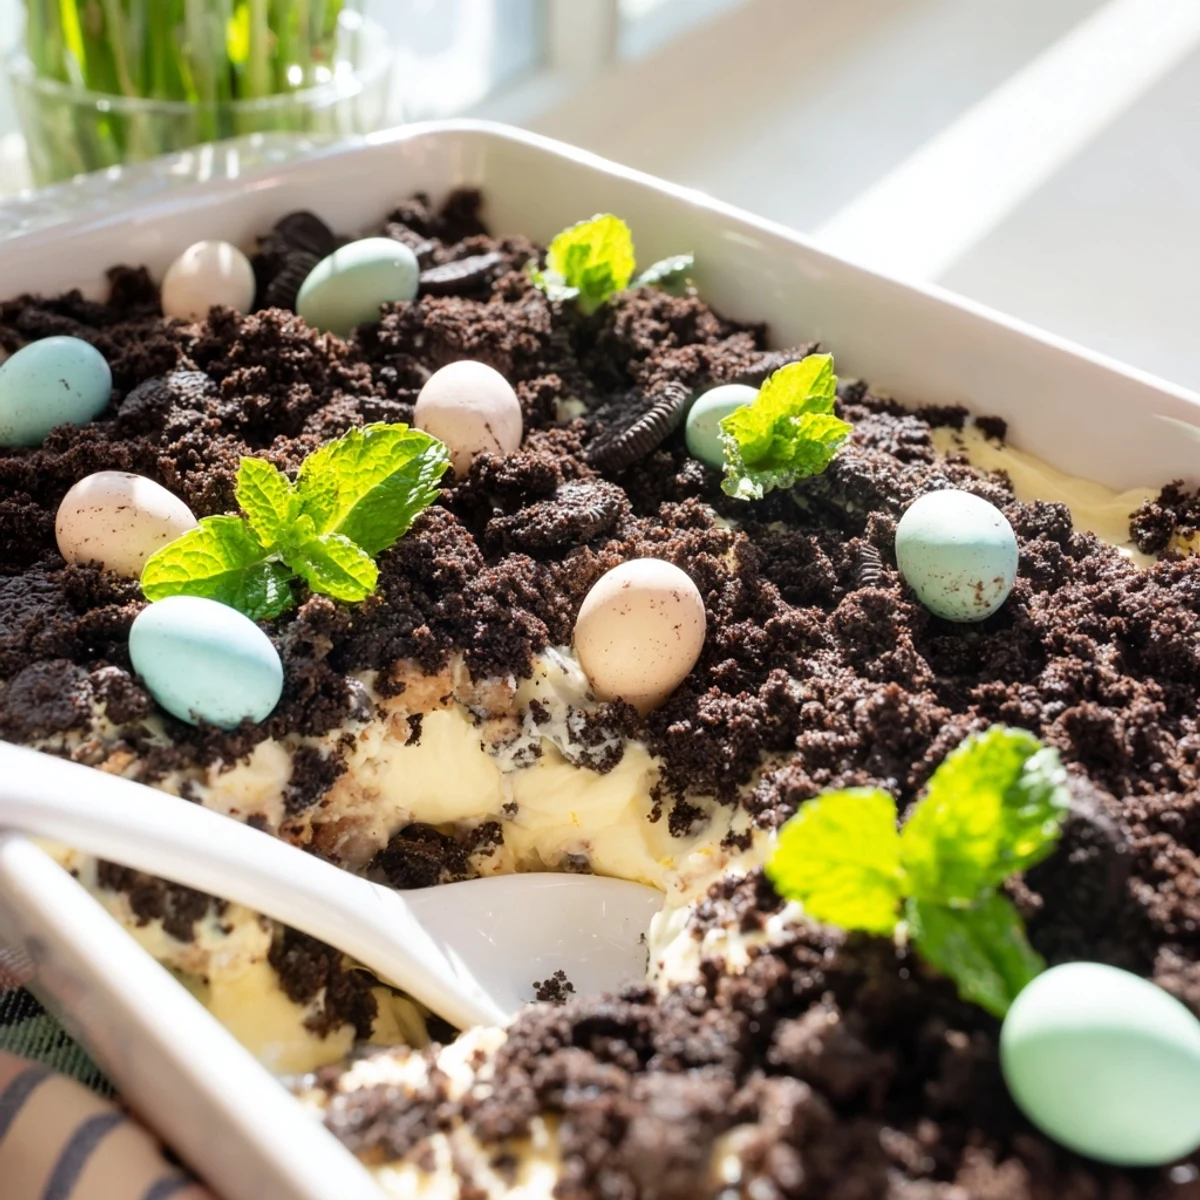
 This festive spring dessert layers crushed chocolate sandwich cookies with a smooth cream cheese mixture, vanilla pudding blended with whipped topping, and finishes with pastel Easter candies scattered across the top like hidden treasures. The crumbly cookie "dirt" creates the perfect bed for colorful chocolate eggs and gummy candies, making it an eye-catching centerpiece for spring gatherings and Easter celebrations.
The kitchen counter looked like a confetti explosion when my niece decided we needed more color on top. I'd been crushing chocolate cookies for what felt like forever, filling the whole house with that rich cocoa scent, while she kept sneaking pastel eggs from the bowl. By the time we finished assembling this Easter dirt cake casserole, we both had chocolate on our noses and couldn't stop laughing at how ridiculous it looked.
Last spring, my sister hosted Easter and put me in charge of dessert while juggling a toddler and a ham that refused to cook on schedule. I threw this casserole together in twenty-five frantic minutes, tucked it in the fridge to set, and forgot about it until dinner was over. When I brought it out, the table went completely silent, then erupted with oohs and aahs like I'd spent all day crafting something elaborate.
Ingredients
- Chocolate sandwich cookies: These create your dirt foundation. I've learned that crushing them to varying sizes—some fine, some chunky—adds more texture and makes it look more like real soil
- Cream cheese: Use full-fat and let it soften completely. Trying to beat cold cream cheese into butter creates those stubborn lumps that never quite disappear, no matter how long you mix
- Unsalted butter: Room temperature is non-negotiable here. I've made the mistake of microwaving it just to soften it faster, and it changes how the cream cheese mixture incorporates
- Powdered sugar: This sweetens and stabilizes the cream cheese layer. Sift it if you can, because those tiny clumps of powdered sugar are surprisingly stubborn to beat out
- Instant vanilla pudding mix: The instant variety is crucial here. Cooked pudding won't set the same way once you fold in the whipped topping, and nobody wants a soupy dirt cake
- Cold milk: Use actual cold milk from the fridge, not room temperature. I've noticed the pudding thickens better and faster when the milk is properly chilled
- Pure vanilla extract: Don't skip this even though the pudding is already flavored. That extra hit of vanilla makes the creamy layers taste homemade instead of like instant pudding
- Whipped topping: Thaw it completely in the fridge, not on the counter. Frozen chunks in your pudding layer are not the texture surprise you're looking for
- Pastel chocolate eggs: These are your buried treasure. I've found that pressing them slightly into the top layer helps them stay put instead of rolling off when you transport the dish
Instructions
- Crush your cookies:
- Grab a rolling pin and take out any stress on that bag of cookies. Some people use food processors, but I actually prefer the irregular texture you get from hand-crushing—big chunks mixed with fine crumbs makes the final dish look more like real dirt
- Beat the cream cheese mixture:
- Use an electric mixer and give it enough time to become genuinely silky. Your patience here determines whether the final bite feels smooth or slightly grainy, and there's a real difference
- Whisk the pudding:
- Let it sit for those full two minutes until slightly thickened. I've gotten impatient before and folded in the whipped topping too early, ending up with a layer that never quite set properly
- Layer the base:
- Sprinkle—don't dump—the first layer of crumbs. An even base means every spoonful gets that perfect cookie-to-cream ratio instead of some people getting all dirt and no treasure
- Spread the cream cheese:
- This layer needs to go all the way to the edges. I use an offset spatula, but the back of a spoon works fine if you don't have one. Just make sure it's level
- Add the pudding:
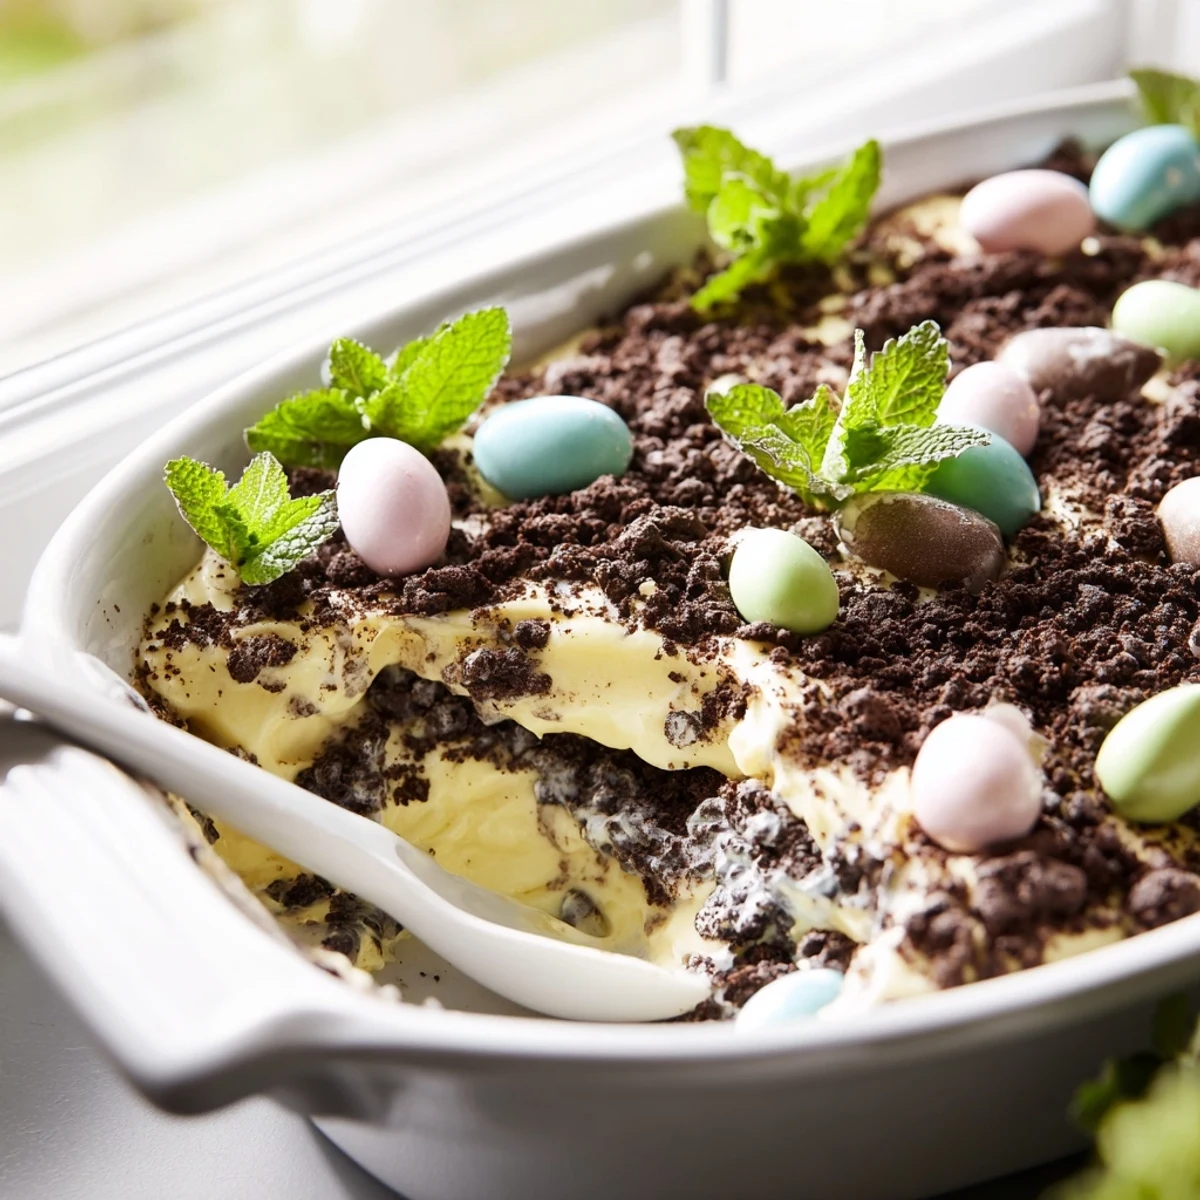
- Pour it gently and spread slowly so you don't pull up the cream cheese layer underneath. Rushing this step creates muddy streaks that mar your clean layers
- Top with remaining crumbs:
- Cover the entire surface. Any spots of pudding showing through will look unappetizingly wet once chilled, and you want that consistent dirt appearance
- Decorate like you're hiding eggs:
- Arrange the candies so they look partially buried, like they're peeking out of the soil. Tuck mint sprigs around them for that convincing grass effect that makes people do a double-take
- Chill thoroughly:
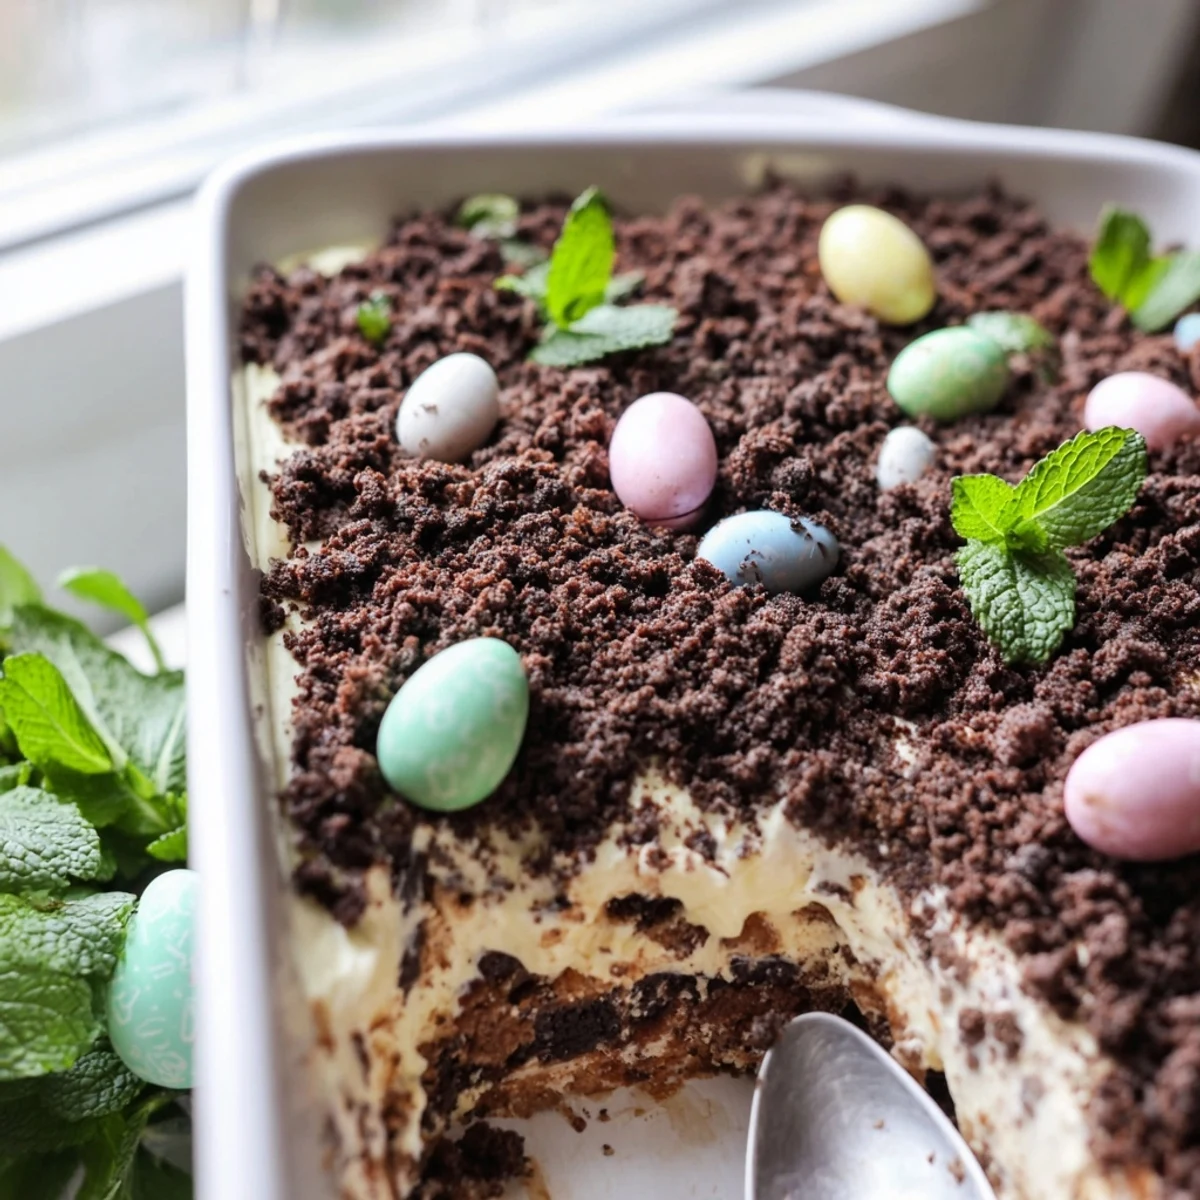
- Two hours minimum, but overnight is even better. The flavors meld together beautifully, and the layers firm up enough that you get clean, impressive squares when you serve it
 Pin It
 My dad, who claims he doesn't like desserts that are too sweet, went back for thirds at Easter dinner last year. He kept saying he was just testing the different candy pieces, but by his third serving, he wasn't even pretending anymore. Now he asks me in January if I'm making it again.
Making It Your Own
Chocolate pudding creates this incredibly rich version that tastes like an elevated dirt cup from childhood. Sometimes I layer half vanilla and half chocolate pudding, creating a swirled effect that looks like actual soil strata when you cut into it.
Serving Suggestions
This is one of those rare desserts that actually pairs beautifully with coffee—the bitterness cuts through all that cream and sugar. I've also served it with dessert wine when hosting, and something about the combination feels unexpectedly sophisticated despite the playful presentation.
Get Creative With Toppings
The topping possibilities are endless once you start thinking beyond Easter. Halloween candy works surprisingly well, and those pastel eggs can easily become tiny eggs hidden in a spring garden scene.
- Shredded coconut dyed green creates amazing grass texture that stays fresh longer than actual mint leaves
- Chocolate bunnies or chicks peeking out from the crumbs make it instantly festive for any spring occasion
- Edible flowers pressed into the top add a sophisticated touch that nobody expects from a dirt cake
 Pin It
 There's something genuinely joyful about serving a dessert that makes adults feel like kids again, watching them get excited about digging for buried treasure in their own bowl.
Recipe Q&A
- → Can I make this dirt cake casserole ahead of time?
-
Yes, this dessert actually improves after chilling for at least 2 hours. You can prepare it up to 24 hours in advance, keeping it covered in the refrigerator. Add fresh mint leaves just before serving for the best appearance.
- → What type of cookies work best for the dirt base?
-
Chocolate sandwich cookies like Oreos are traditional and provide the rich dark color needed for the dirt effect. You can use chocolate graham crackers or vanilla sandwich cookies processed with cocoa powder as alternatives.
- → Can I substitute the whipped topping?
-
Yes, you can use freshly whipped cream instead of frozen whipped topping. Whip 2 cups of heavy cream until stiff peaks form, then fold it into the pudding mixture just as you would the thawed topping.
- → How should I store leftovers?
-
Keep the casserole covered in the refrigerator for up to 3-4 days. The cookie layers will soften slightly over time but remain delicious. Avoid freezing as the texture of the pudding and whipped components changes when thawed.
- → Can I make this gluten-free?
-
Absolutely. Use gluten-free chocolate sandwich cookies for the crust and verify that your pudding mix and candies are certified gluten-free. Many major brands offer GF versions that work perfectly in this layered dessert.
- → What other candies work well for decorating?
-
Pastel Jordan almonds, chocolate-covered malt balls, colorful sprinkles, or seasonal candy-coated chocolates all create beautiful Easter nest effects. Consider using dyed green coconut shreds as additional grass texture around the candies.
