 Pin It
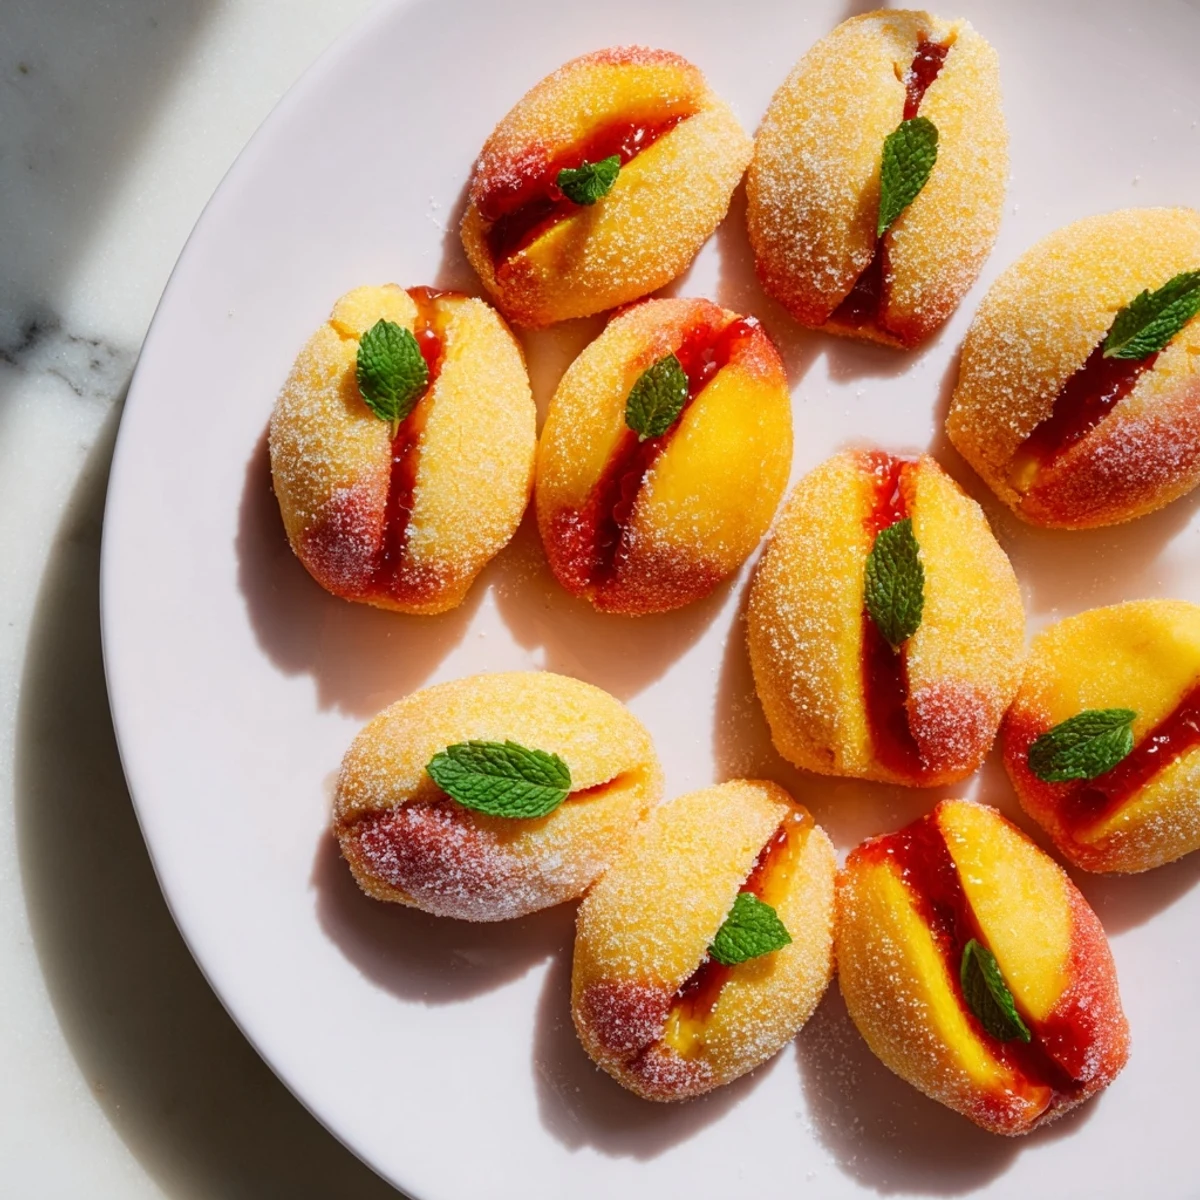
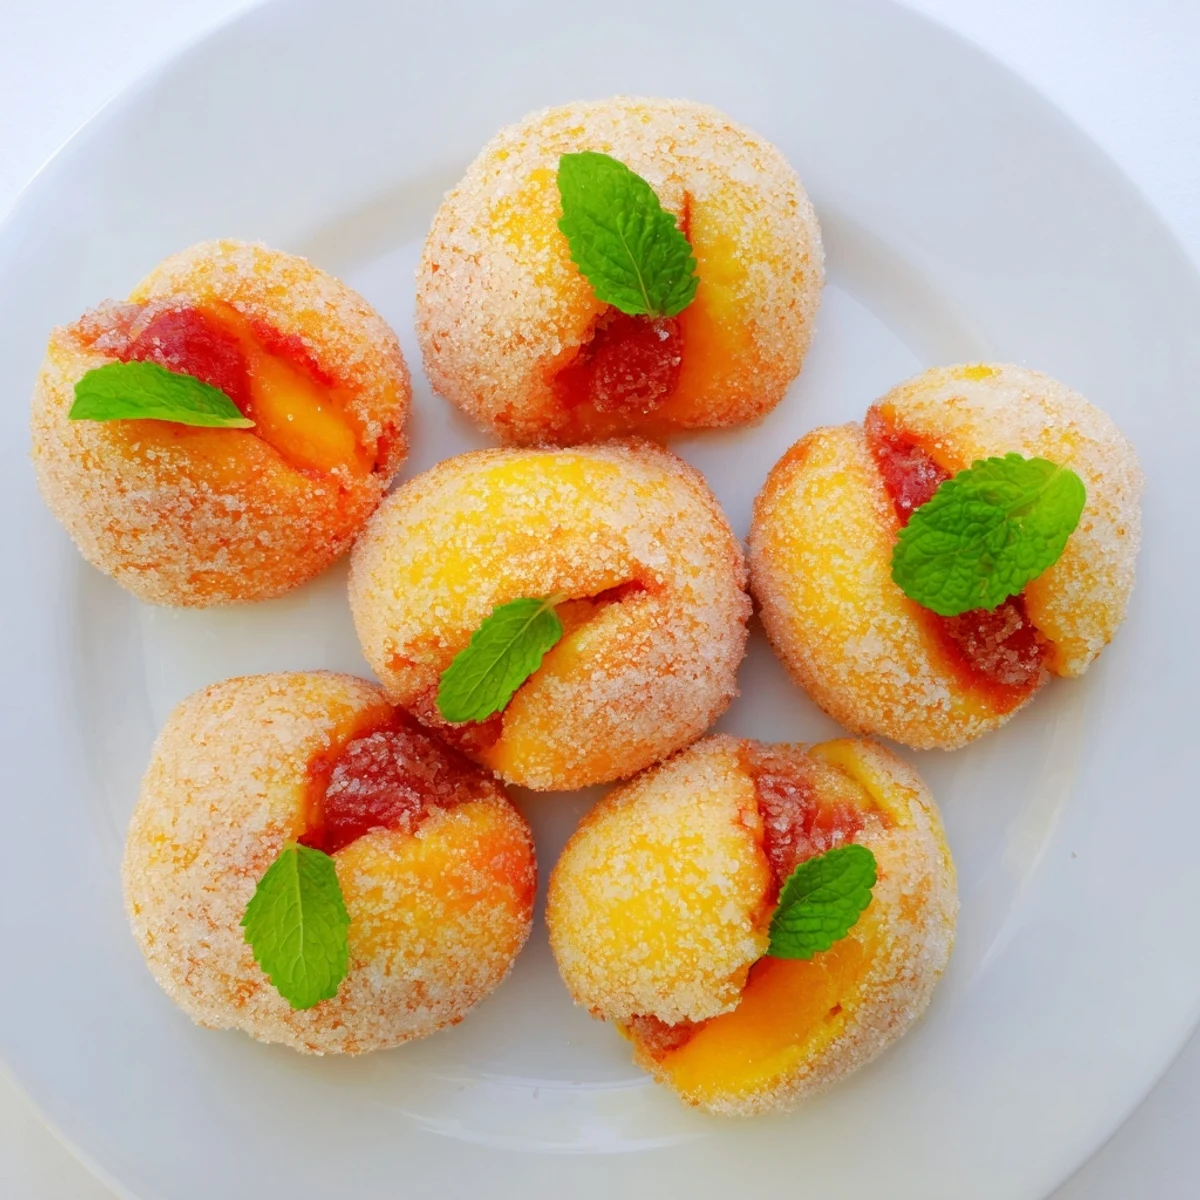
 Create charming Italian peach-shaped cookies that look almost too beautiful to eat. These delicate sandwich cookies feature a buttery vanilla dough filled with a luscious blend of dark chocolate and fruity jam. The magic happens when you hand-paint each cookie with red and yellow food coloring, then roll them in sparkling sugar for that authentic peach fuzz finish. Perfect for holidays, parties, or when you want to impress with edible art.
My grandmother brought this recipe back from a trip to Tuscany, written on a stained index card she'd tucked into her travel journal. She made them for my sister's wedding shower, and I still remember the gasp when guests realized those perfect little peaches were actually cookies.
Last summer I made three batches for a neighborhood block party, setting them out in a rustic wooden bowl. My neighbor Mario, who'd grown up in Naples, took one bite and got teary eyed, saying they tasted exactly like the ones his nonna made for special occasions.
Ingredients
- All purpose flour: The structure builder, measuring precisely keeps these tender yet sturdy enough for hollowing
- Unsalted butter: Room temperature butter creates that perfect melt in your mouth texture Italian cookies are famous for
- Granulated sugar: Cream this thoroughly with butter for the best crumb structure
- Large eggs: Add them one at a time, letting each fully incorporate for the richest dough
- Whole milk: This keeps the dough soft and prevents the cookies from becoming too crisp
- Baking powder: The secret lift that gives these just enough puff without spreading too thin
- Salt: Even a pinch wakes up all the other flavors and balances the sweetness
- Vanilla extract: Pure vanilla makes all the difference in simple butter cookies
- Lemon zest: Fresh zest adds a bright aromatic note that complements the peach filling beautifully
- Peach or apricot jam: The fruity backbone that pairs so perfectly with dark chocolate
- Dark chocolate: Chop it yourself for even melting and better flavor than chips
- Heavy cream: Creates that silky ganache texture for the filling
- Red and yellow food coloring: Gel colors work best for vibrant, believable peach skins
- Granulated sugar: The final coating that gives that realistic peach fuzz effect
- Fresh mint leaves: The little stem that makes everyone do a double take
Instructions
- Getting started:
- Preheat your oven to 350°F with plenty of time for it to fully heat. Line two baking sheets with parchment paper so nothing sticks and cleanup is effortless.
- Creaming butter and sugar:
- Beat the softened butter and sugar together until the mixture is pale and fluffy, about three full minutes. This step is crucial for cookies that melt in your mouth rather than feeling dense or heavy.
- Adding eggs and flavor:
- Add the eggs one at a time, beating completely after each addition. Mix in the vanilla extract and lemon zest until they're distributed evenly throughout the batter.
- Combining dry ingredients:
- Whisk together the flour, baking powder, and salt in a separate bowl. This ensures the leavening is evenly distributed so every cookie bakes up perfectly.
- Mixing the dough:
- Gradually add the dry ingredients to the butter mixture, alternating with the milk. Mix just until a soft dough forms, being careful not to overwork it or the cookies will become tough.
- Shaping the cookies:
- Roll tablespoon sized portions of dough into balls and space them two inches apart on your prepared baking sheets. They need room to spread slightly while baking.
- Baking to perfection:
- Bake for fifteen to eighteen minutes until the bottoms are just barely golden. Remove them when they're set but still pale on top for the softest texture.
- Cooling completely:
- Let the cookies cool completely on the baking sheet. Warm cookies will crumble when you try to hollow them out, so patience really pays off here.
- Creating the cavity:
- Carefully scoop out a small hollow from the flat side of each cookie using a small knife or spoon. Save every crumb you remove because they're essential for the filling.
- Making the filling:
- Melt the chopped dark chocolate with the heavy cream until smooth. Stir in the reserved cookie crumbs and jam to create a thick, spreadable filling.
- Assembling the peaches:
- Fill the hollowed side of one cookie generously with the chocolate mixture. Press another cookie on top to form a peach shape, wiping away any filling that squeezes out.
- Coloring the cookies:
- Mix a few drops of red and yellow food coloring into small bowls of water. Lightly brush each cookie with the colors, blending them to create natural looking peach variations.
- Sugar coating:
- Roll each colored cookie in granulated sugar while the coloring is still slightly damp. This creates that beautiful velvety finish that makes them look freshly picked.
- Adding the final touch:
- Tuck a small mint leaf into the top of each peach where the cookies meet. This little detail is what makes people question whether they're actually real fruit.
 Pin It
 My daughter helped me make these for her school's international day last year. She took such pride in explaining to her classmates that yes, they really were cookies, watching their eyes widen in delighted disbelief.
Mastering the Peach Shape
The secret to convincing peaches is creating a slight indentation where the two cookies meet before pressing them together. I learned this after my first batch looked more like little oranges than peaches. Gently squeeze the assembled cookie to create that characteristic peach cleft at the top, but be gentle or you'll crack the delicate shell.
Coloring Like an Artist
Natural peaches aren't perfectly uniform, so don't worry about making every cookie look identical. Some should have more yellow tones, others more pink blush. I keep a small piece of paper towel handy to blot excess color as I work, building up layers gradually. This technique creates that sun kissed look that makes people lean in closer.
Storage and Serving Tips
These cookies actually develop better flavor after a day or two in an airtight container. The filling softens the interior slightly and melds with the shell, creating that perfect Italian bakery texture.
- Store them in a single layer to prevent the sugar coating from rubbing off
- Bring them to room temperature before serving for the best texture experience
- These freeze beautifully for up to a month if you need to make them ahead
 Pin It
 These peach cookies have become my go to gift for anyone who needs a little joy in their life. There's something magical about food that makes people smile before they even take a bite.
Recipe Q&A
- → What makes Italian peach cookies unique?
-
These distinctive cookies are shaped like peaches, hand-colored with food dye to create realistic blushing gradients, then rolled in sugar to mimic the fuzzy texture of fresh fruit. The combination of chocolate and jam filling creates a delightful surprise inside.
- → Can I make these cookies ahead of time?
-
Yes, these cookies actually improve with time. Letting them sit overnight allows the flavors to meld and the texture to become softer and more tender. Store in an airtight container at room temperature for up to 5 days.
- → What jam works best for the filling?
-
Traditional peach jam provides the most authentic flavor, but apricot or raspberry jam create delicious variations. Choose a high-quality jam with good fruit content for the best filling consistency and taste.
- → How do I achieve realistic peach coloring?
-
Mix separate small bowls of water with red and yellow food coloring. Brush yellow over the entire cookie first, then lightly dab red coloring on one side to create a natural blush effect. Blend where the colors meet for a gradient look.
- → Can I freeze Italian peach cookies?
-
Yes, freeze unfilled cookies for up to 3 months. Thaw completely before filling and decorating. For best results, add the filling and sugar coating shortly before serving to maintain texture and appearance.
- → What tools do I need to make these cookies?
-
You'll need basic baking equipment including mixing bowls, an electric mixer, baking sheets with parchment paper, and a small knife or melon baller for hollowing the cookies. A pastry brush is essential for applying the food coloring.
