 Pin It
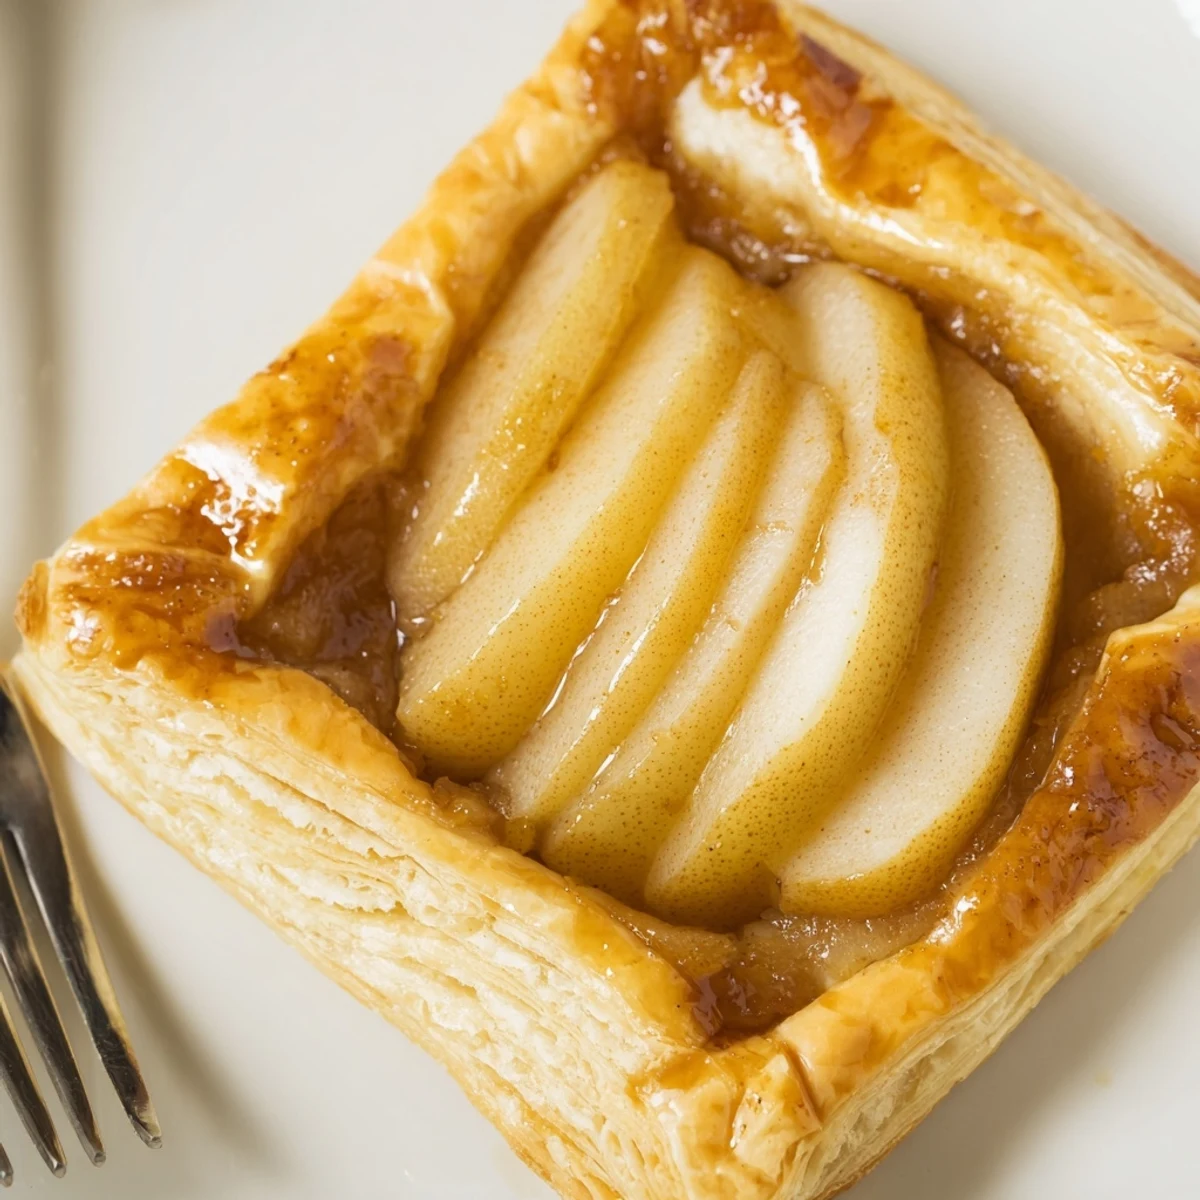
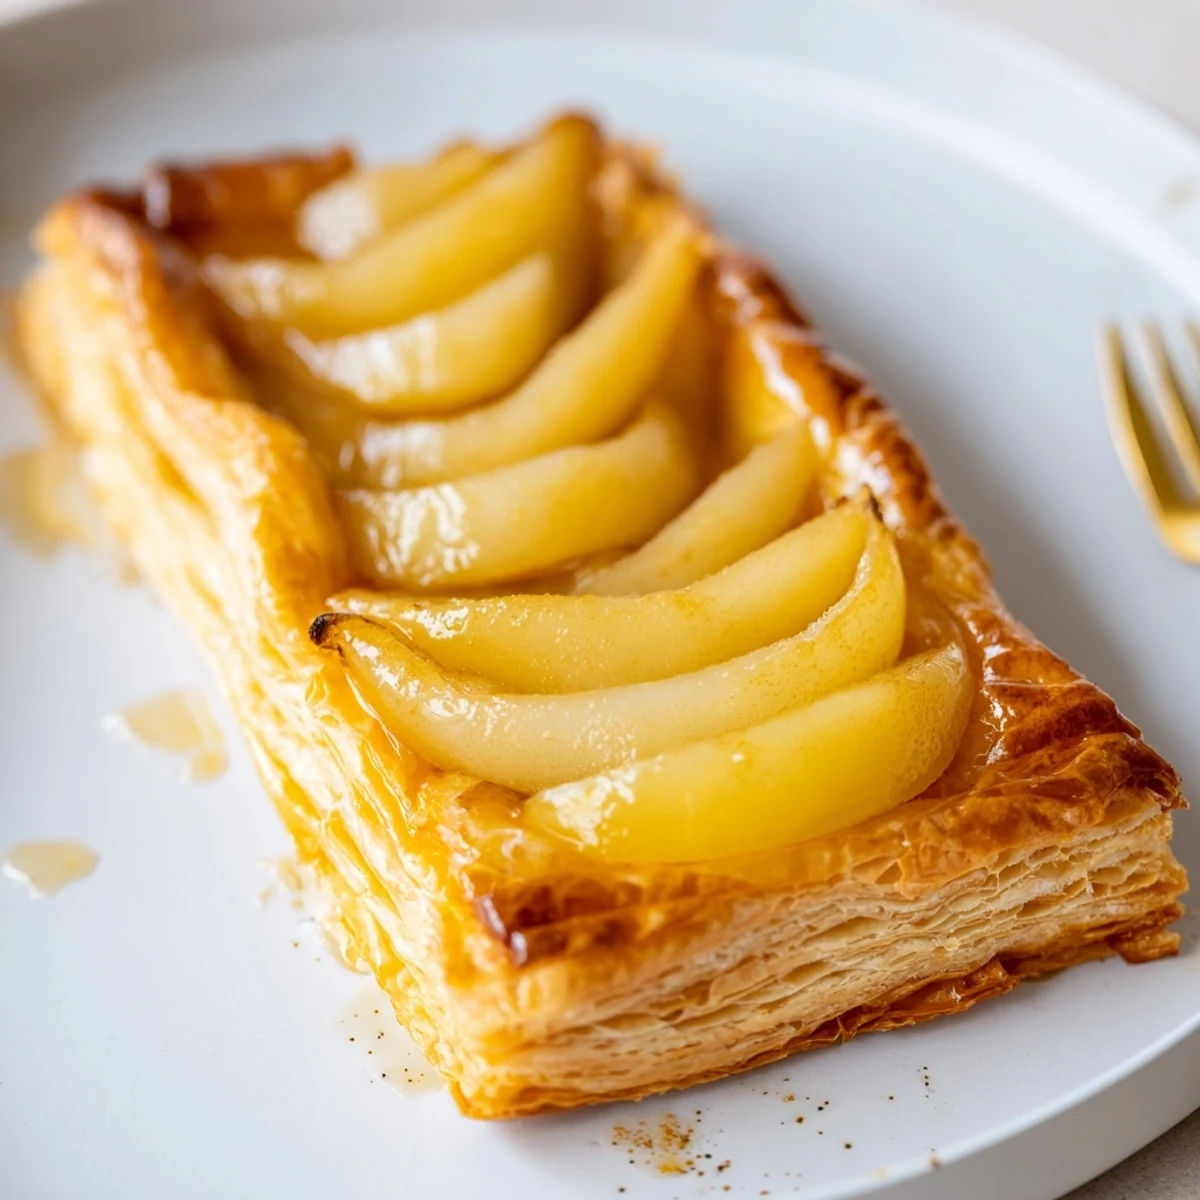
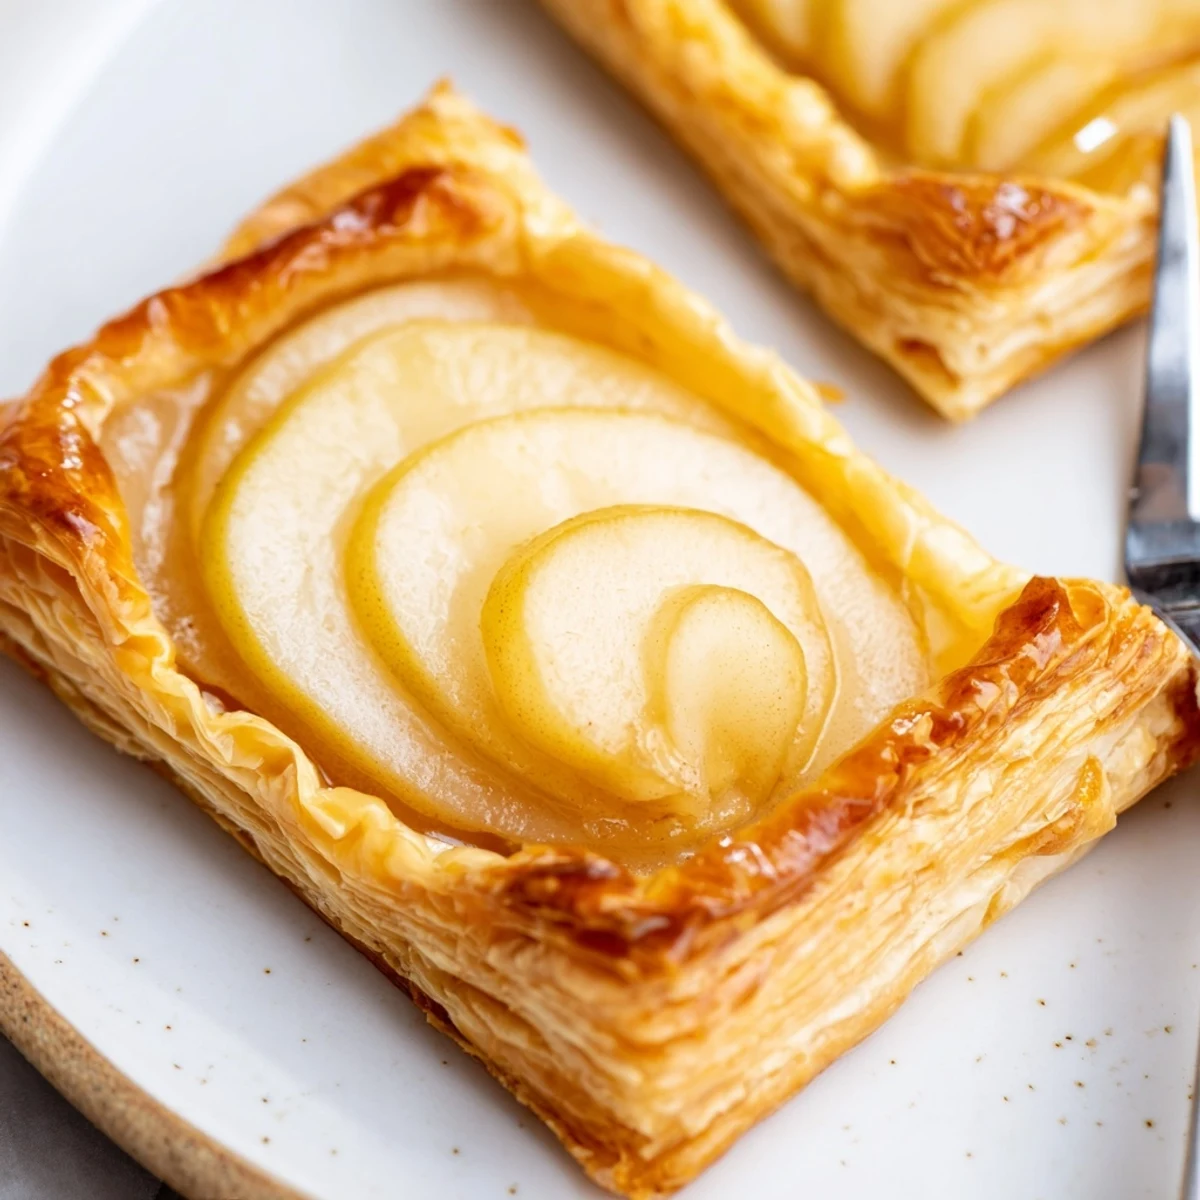
 In about 45 minutes, ripe pear slices are gently tossed with sugar, lemon and cinnamon, then arranged on rolled puff pastry and baked until puffed and golden. A warm apricot glaze brushed over the fruit adds shine and sweetness. Serve slightly warm with toasted nuts or vanilla ice cream. For a dairy-free option, choose plant-based pastry and a soy milk wash.
The first time these pear puff pastries emerged from my oven, I couldn't resist leaning in close—each one crackled as it cooled, letting off the irresistible aroma of cinnamon and fruit. It had started as a simple midweek experiment to use up a bowl of pears, but the flakey, golden result turned my quiet afternoon into something unexpectedly special. Sometimes, the best bakes are the ones that demand little planning but offer plenty of reward. The combination of warm pear and crisp, buttery pastry still reminds me how easily dessert can transform the mood of any day.
Once, I made a batch of these for a neighbor who stopped by unexpectedly on a dreary Sunday. We ended up sharing stories over plates of warm pastry at the kitchen table, sticky fingers and laughter included, and to this day she still brings up the way they filled the whole house with the scent of pears and spice. Those small, unplanned gatherings always seem to make these pastries taste even better.
Ingredients
- Ripe pears: Choose pears that just yield to gentle pressure—too firm and they won’t bake up tender, too soft and they’ll turn mushy. I always taste a slice before using, adjusting the sugar if the fruit is extra sweet.
- Granulated sugar: A thin sugar coating draws out the pears’ juice and encourages slight caramelization in the oven, never skip it.
- Lemon juice: It brightens the filling while ensuring the pears stay beautiful and don’t brown—a trick I picked up after one too many beige pastries.
- Ground cinnamon: Just half a teaspoon, but what a difference! It’s the aroma that makes everyone peek into the kitchen.
- Frozen puff pastry: Buy a good brand—let it thaw in the fridge so it stays easy to handle but doesn’t get sticky. Trust me, rushing this makes everything frustrating.
- Egg: A beaten egg adds color and shine when brushed over the pastry edges, giving that irresistible bakery finish.
- Apricot jam: Warmed and brushed over the pears, it adds shine and sweetness, making each pastry look polished and inviting.
- Water: Loosens the jam so it brushes on easily; a tiny detail but makes all the difference.
- All-purpose flour: Just a dusting for your countertop so the pastry doesn’t stick. Helps keep each rectangle neat and easy to maneuver.
Instructions
- Heat the oven:
- Set your oven to 200°C (400°F) and line a baking sheet with parchment—there’s real satisfaction in the way the paper crinkles under your hands.
- Toss the pears:
- Add pear slices to a bowl with sugar, lemon juice, and cinnamon, and turn them gently so every piece is glossy and fragrant, then let them rest while you prep the pastry.
- Prep the pastry:
- Scatter some flour on your countertop, unfold the thawed puff pastry, and gently roll to seal any cracks—don’t overwork it or you’ll lose the flake.
- Shape and fill:
- Divide the pastry into 6 rectangles, then pile a cluster of pears in the center of each, leaving space all around so the juices don’t run wild.
- Form the edges:
- Fold edges of each rectangle inward to catch the pears, pinching or pressing gently to make a delicate rim.
- Add the egg wash:
- Brush the pastry edges with beaten egg, listening for that faint tap of the brush on flaky dough—egg wash is what gives them their irresistible sheen.
- Arrange and bake:
- Transfer the pastries to your lined tray, spacing them out so the heat can work its magic, and bake until puffed and golden, about 20–25 minutes.
- Make the glaze:
- Warm apricot jam with a splash of water in a small saucepan until it slides easily off a spoon; you can strain it if you want a perfectly smooth glaze.
- Glaze and serve:
- As soon as the pastries come out, brush the pears with jam while they’re still warm to lock in flavor and add shine—don’t worry if a little drips onto the pastry.
- Cool and enjoy:
- Let the pastries cool just enough to handle, then serve warm or at room temperature with a generous smile.
 Pin It
 These pastries are now a staple for late afternoon tea with friends, when the conversation lingers and everyone needs a second helping. That familiar, sugary jam scent clings to the air long after the last crumbs are gone, turning each gathering into a memory I want to revisit again and again.
Choosing and Preparing Fruit
Over time, I realized that slightly underripe pears actually hold their shape a bit better, especially if the batch sits out on the counter for a couple of days before baking. Taste as you go—it’s the only way to tell if you might need to add a pinch more sugar or even a squeeze more lemon. Small adjustments make these pastries feel personal, every time.
Glaze and Garnish Upgrades
I sometimes swap in honey or maple syrup for a different finish, and on special days, a handful of toasted nuts on top adds a playful, elegant crunch. That final glossy shine always gets compliments, and it only takes an extra minute or two while the pastries are still warm. Don’t be shy with the glaze—it turns every pastry into a little jewel.
Serving, Storing, and Making-Ahead
These pastries are wonderful served slightly warm, but if you have leftovers, just pop them into the oven for a few minutes to revive their flakiness. A scoop of vanilla ice cream or a dollop of whipped cream takes things from casual snack to show-stopping dessert in no time at all. When making ahead, I assemble everything and store it in the fridge, baking just before serving for maximum puff.
- Cool pastries completely before storing.
- Reheat in the oven, never the microwave, to keep them from turning limp.
- Freezing is possible but only before baking; brush with egg and bake from frozen for best results.
 Pin It
 However you serve them—with friends, for yourself, with coffee or as dessert—these pear pastries bring a touch of French flair and a lot of comfort. Here’s hoping they spark as many delicious moments for you as they have for me.
Recipe Q&A
- → Which pears work best?
-
Choose ripe but firm pears such as Bosc or Anjou; they hold shape when baked and become tender without turning mushy.
- → How do I prevent a soggy base?
-
Briefly toss pear slices with sugar and lemon to draw out excess moisture, keep a thin border of pastry, and bake on a preheated sheet for quick lift and crisping.
- → How should I apply the glaze?
-
Warm apricot jam with a little water until glossy, then strain if needed and brush over the fruit immediately after baking to seal and add shine.
- → Can these be prepared ahead or frozen?
-
Assemble unbaked pastries and freeze on a tray until firm, then transfer to a bag. Bake from frozen, adding a few extra minutes. Glaze after baking for best results.
- → Any simple flavor variations?
-
Sprinkle chopped toasted almonds or pistachios before serving, swap apricot glaze for honey or maple, or add a thin almond frangipane layer under the pears for richness.
- → How to make an egg-free finish?
-
Replace the egg wash with a light soy milk or almond milk wash for color and shine, and use plant-based puff pastry to keep it vegan-friendly.
