 Pin It
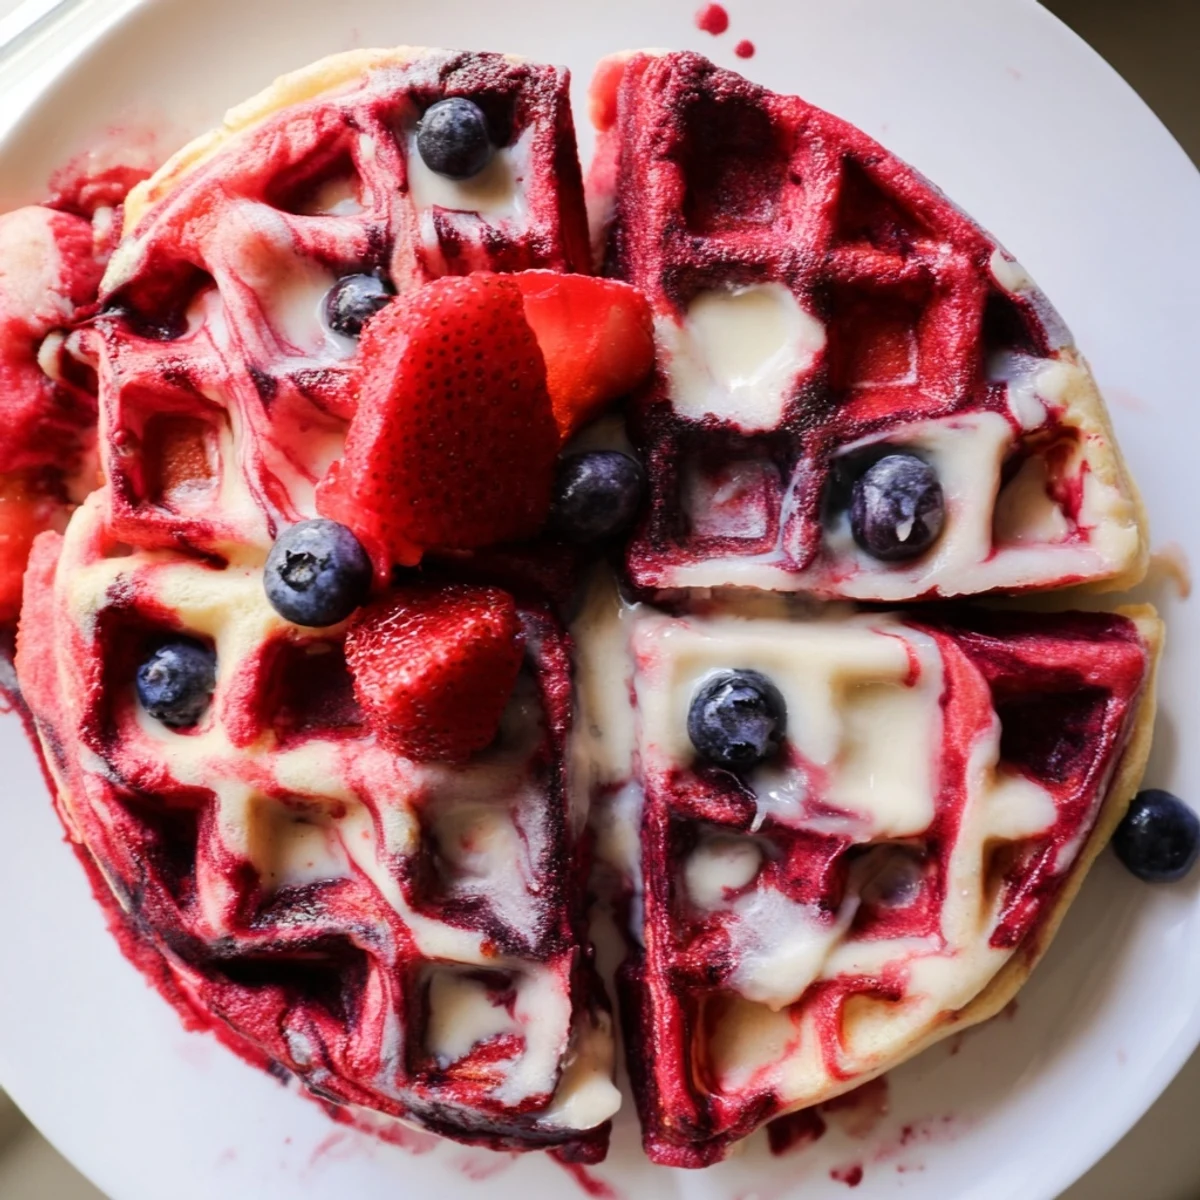
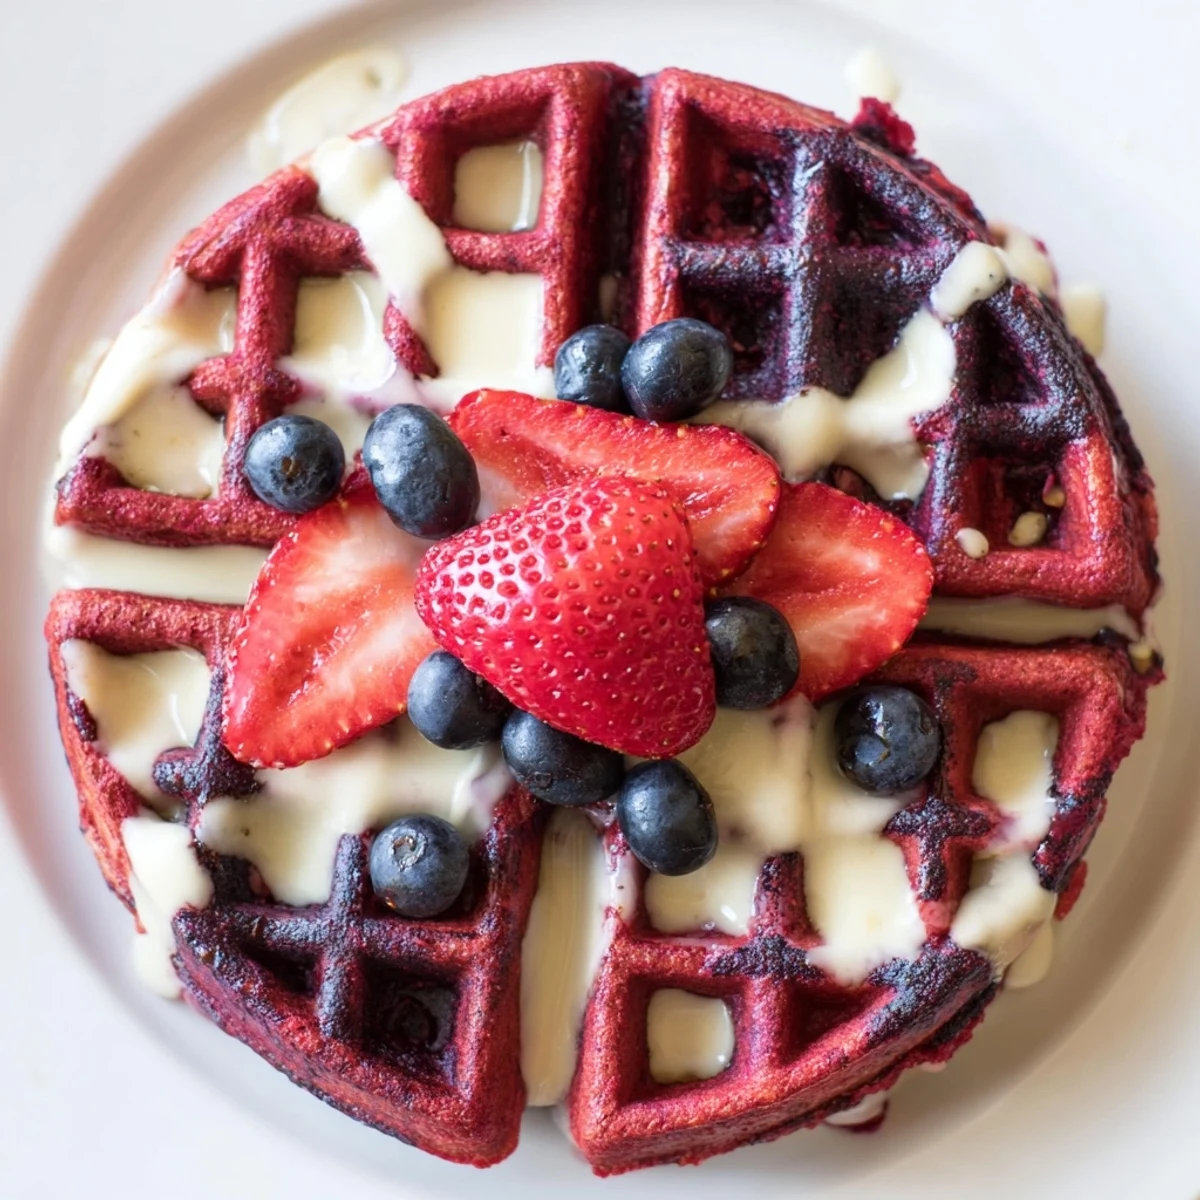
 These striking red velvet marble waffles combine the rich chocolate undertones of classic red velvet with sweet vanilla batter. The swirling technique creates a beautiful marbled pattern that looks impressive on any breakfast table. Ready in just 30 minutes with simple pantry ingredients, they're easier to make than they appear.
The buttermilk-based batter ensures light, fluffy interiors while achieving crispy golden exteriors. Top with cream cheese glaze, maple syrup, or fresh berries for an indulgent brunch centerpiece that serves four generously.
The morning sunlight hit my kitchen counter just right, catching the ruby streaks in the batter. I'd been skeptical about waffle marbling until my cousin challenged me last winter, claiming restaurant quality swirls were totally achievable at home. She was right, and now these striking waffles have become my go to when I need breakfast to feel like an occasion without the fuss.
My sister in law actually gasped when I lifted the lid on the first batch, the red and vanilla spirals looking more like dessert than breakfast. The kids went wild for the vibrant swirls, and honestly, so did the adults. Something about that visual drama makes regular waffles feel absolutely magical.
Ingredients
- All-purpose flour: The foundation for structure; I learned the hard way that skipping the sifting step can leave stubborn lumps in your batter
- Granulated sugar: Just enough to balance the tang of buttermilk and help achieve that golden exterior crunch
- Baking powder and baking soda: This dynamic duo ensures your waffles rise properly and develop those irresistible air pockets
- Salt: Don't skip it; a pinch enhances all the other flavors and keeps the waffles from tasting flat
- Buttermilk: The secret weapon for tenderness and subtle tang; room temperature ingredients blend more smoothly
- Eggs: Room temperature eggs incorporate better and help create that perfect texture contrast
- Unsalted butter: Melted and slightly cooled so it doesn't scramble your eggs when you whisk them in
- Vanilla extract: Pure extract makes a noticeable difference in the vanilla portion of the marble
- Unsweetened cocoa powder: Adds depth to the red velvet without making it too chocolatey
- Red food coloring: Gel coloring creates more vibrant results with less liquid, but either type works beautifully
Instructions
- Mix the dry foundation:
- Whisk flour, sugar, baking powder, baking soda, and salt in a large bowl until everything is evenly distributed
- Combine the wet ingredients:
- In a separate bowl, whisk buttermilk, eggs, melted butter, and vanilla until completely smooth
- Gentle folding moment:
- Pour the wet mixture into the dry ingredients and fold until just combined; those tiny lumps will disappear during cooking
- Create the two tone magic:
- Divide batter evenly between two bowls, then whisk cocoa and red coloring into one bowl until uniformly vibrant
- Heat things up:
- Preheat your waffle iron and give it a light coating of oil or cooking spray to ensure easy release
- The marble technique:
- Drop alternating spoonfuls of red and vanilla batters onto the hot iron, then give them one gentle swirl with a chopstick or butter knife
- Perfect golden moment:
- Cook until the waffle is crisp and golden, usually 3 to 5 minutes depending on your iron's temperament
- Serving time:
- Top immediately with cream cheese glaze, maple syrup, or fresh fruit while they're still crisp and warm
 Pin It
 These became an instant tradition at our annual Valentine's Day brunch, but honestly, they show up whenever I need breakfast to feel special. Last month my neighbor texted asking for the recipe after her daughter raved about them at our weekend potluck.
Making The Perfect Marble
I've found that placing the red and vanilla batters in separate piping bags or zip lock bags gives me more control over the swirl pattern. Just snip the corner and pipe alternating blobs directly onto the iron for restaurant worthy marbling every time.
That Cream Cheese Glaze
Beat the cream cheese until completely smooth before adding any liquid; tiny lumps will ruin the pourable texture. Warm the milk slightly for about ten seconds in the microwave to help everything incorporate without leaving grainy bits behind.
Make Ahead Magic
These reheat beautifully in the toaster oven, maintaining that crucial exterior crispness that microwaves ruthlessly destroy. Cook a big batch on Sunday, and Tuesday morning breakfast becomes nothing more than a quick warm up.
- Freeze cooled waffles in single layers between parchment paper
- Reheat directly from frozen at 350°F for about 5 minutes
- Let them cool completely on a wire rack before freezing to prevent sogginess
 Pin It
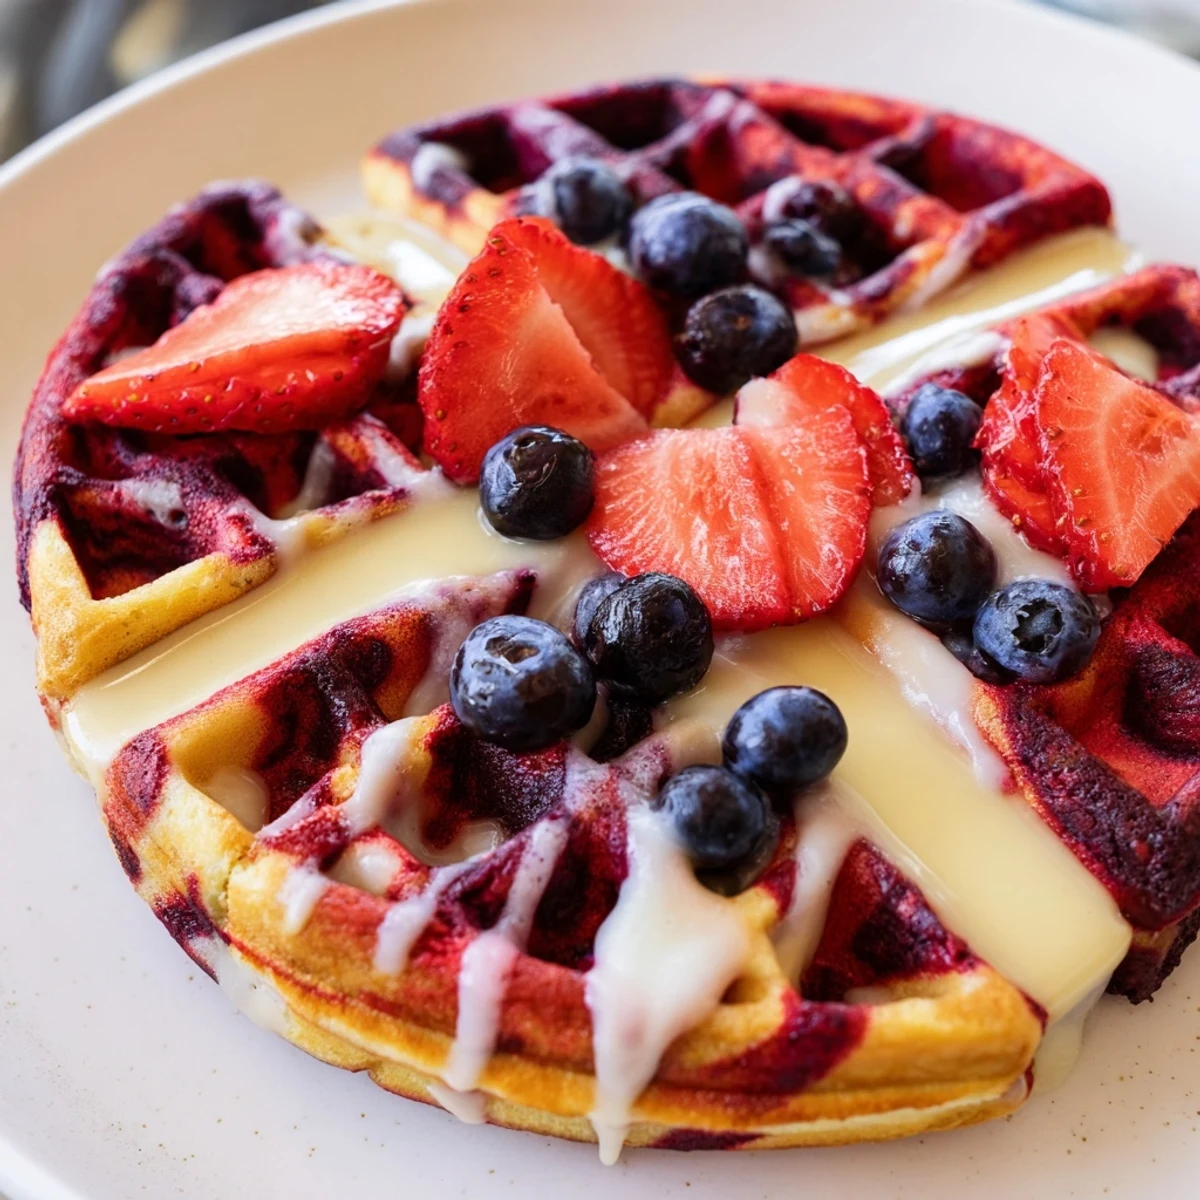
 There's something genuinely joyful about cutting into a waffle and revealing that stunning swirl pattern inside. Hope these bring a little unexpected beauty to your breakfast table.
Recipe Q&A
- → How do I achieve the perfect marble effect?
-
Alternate dollops of red velvet and vanilla batters onto the waffle iron, then gently swirl once with a chopstick or knife. Avoid over-swirling which blends the colors too much and loses the distinct marble pattern.
- → Can I make the batter ahead of time?
-
Prepare both batters separately and refrigerate in sealed containers for up to 12 hours. The baking powder may lose some potency, so add an extra 1/4 teaspoon if batter sits overnight. Let chilled batter reach room temperature before cooking.
- → What if I don't have buttermilk?
-
Substitute with an equal amount of plain yogurt thinned with milk, or make homemade buttermilk by adding 1 tablespoon of vinegar or lemon juice to 1 3/4 cups milk. Let sit for 5 minutes before using.
- → Can I use natural food coloring?
-
Beet juice or pomegranate juice can replace artificial red coloring, though the shade will be more burgundy than bright red. Start with 2 tablespoons and adjust until you reach your desired hue.
- → How do I store leftover waffles?
-
Cool completely, then freeze in a single layer before transferring to freezer bags for up to 3 months. Reheat in a toaster or 350°F oven for 5-7 minutes until crisp and warmed through.
- → What toppings work best?
-
Cream cheese glaze complements the classic red velvet flavors beautifully. Maple syrup, fresh strawberries, whipped cream, or a dusting of powdered sugar also enhance the presentation and taste.
