 Pin It
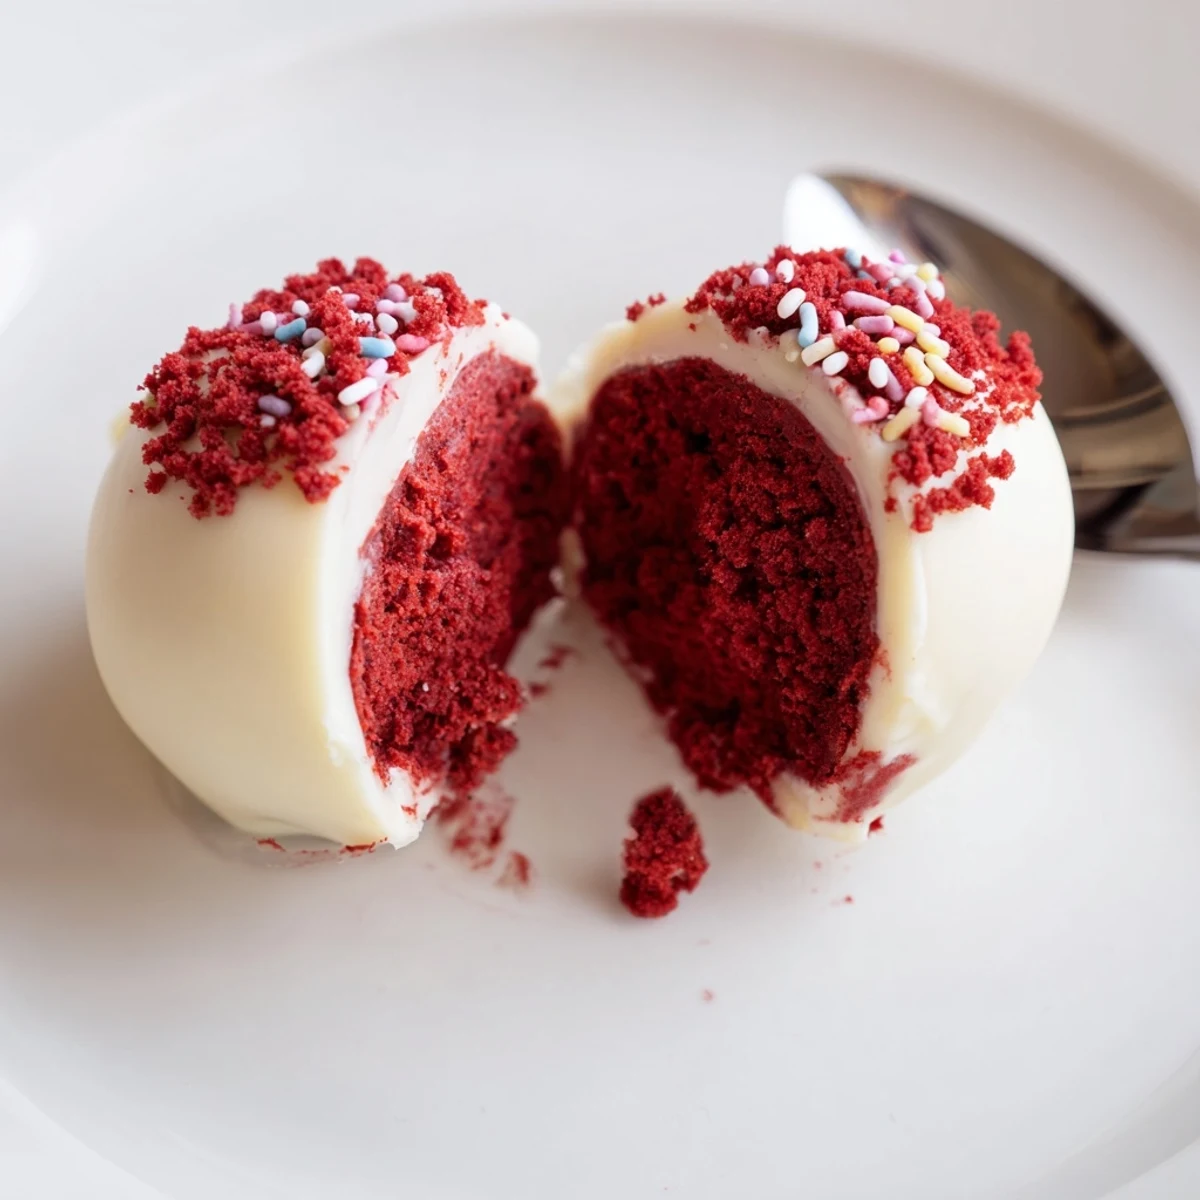
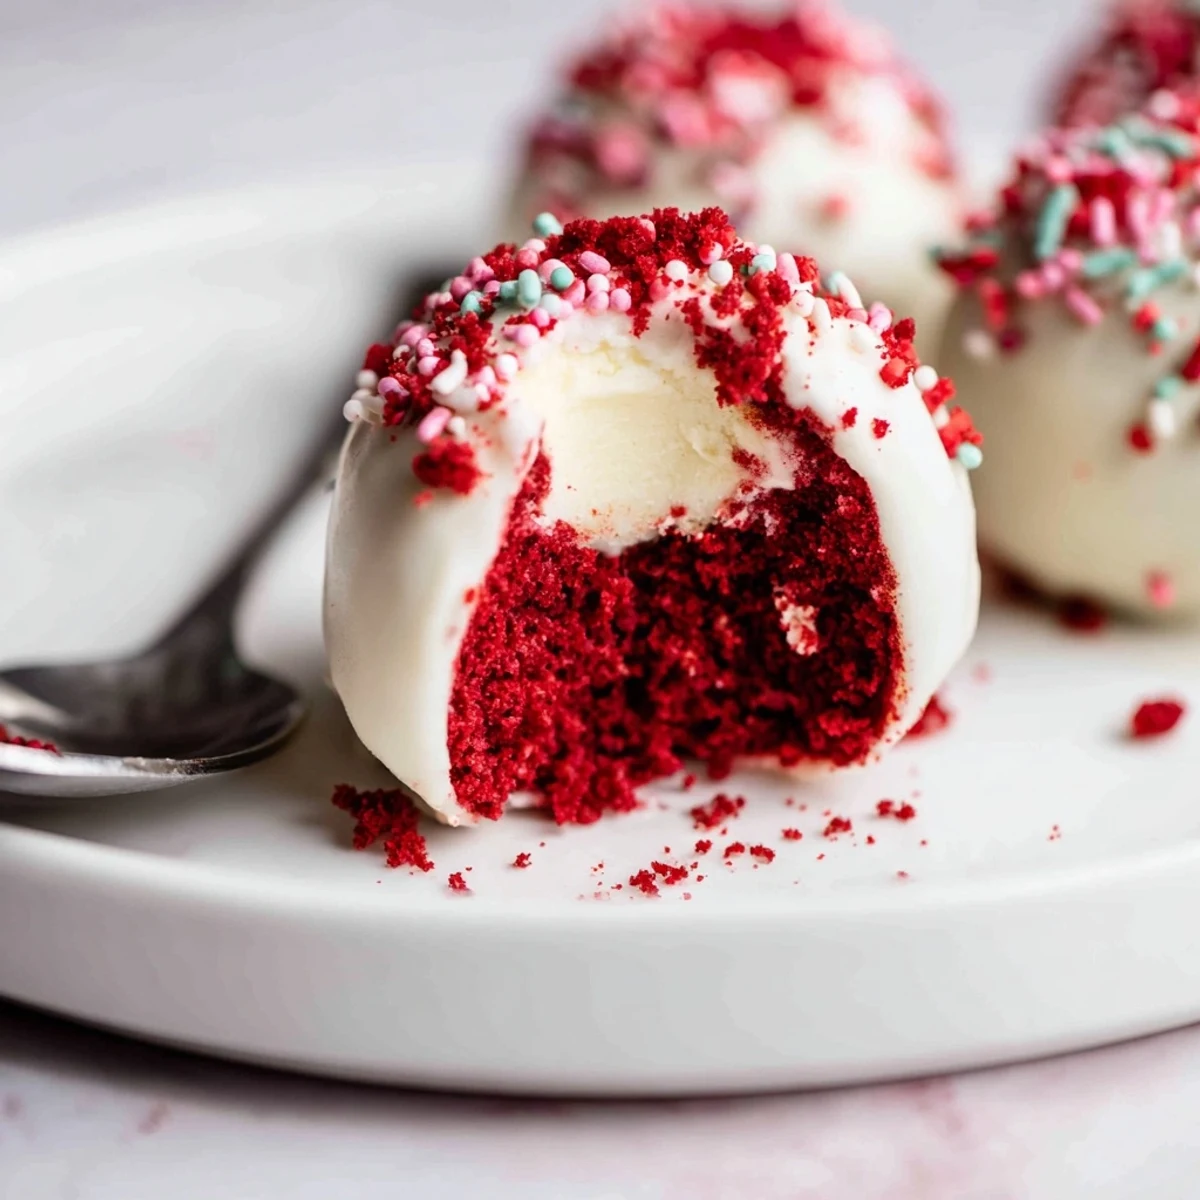
 Combine crumbled red velvet cake with softened cream cheese, powdered sugar and vanilla until a soft, dough-like mixture forms. Scoop into tablespoon-sized portions, roll into balls and chill until firm. Dip chilled balls in melted chocolate, add red coloring if desired, then garnish with crumbs or sprinkles. Let coating set and store chilled up to five days; try dark chocolate or chopped nuts for variation.
The kitchen smelled like a bakery had collided with a candy factory, and honestly, that was exactly the chaos I was aiming for. Red velvet cheesecake balls happened on a rainy Tuesday when I had leftover cake and zero desire to bake anything new. My roommate walked in, grabbed one before the chocolate had even set, and declared it the best thing Id ever made in that apartment.
I brought a batch of these to a friends holiday potluck last December and watched a quiet crowd form around the dessert table within ten minutes. Someone asked if I had ordered them from a boutique bakery, which remains one of the proudest moments of my amateur cooking life.
Ingredients
- Red velvet cake (300 g, fully baked and cooled): Store-bought works perfectly fine, and honestly day-old cake crumbs even better because it binds more easily.
- Cream cheese (200 g, softened): Let it sit out for about thirty minutes so it blends without lumps, because smooth filling is everything here.
- Powdered sugar (40 g): Just enough to sweeten the filling without making it cloying or overpowering the tang of the cream cheese.
- Vanilla extract (1 tsp): Use the real stuff if you have it, as the flavor difference in a simple mixture like this is noticeable.
- White chocolate (250 g): Good quality melting chocolate makes coating easier and gives a cleaner snap when you bite into it.
- Red food coloring (optional, for coating): A few drops turn plain white chocolate into a gorgeous pinkish red that looks stunning.
- Red velvet crumbs or sprinkles (optional, for decoration): Save a handful of cake crumbs before mixing for a rustic finish.
Instructions
- Break down the cake:
- Crumble the red velvet cake into a large bowl using your fingers, pressing out any large chunks until you have a fine, even crumb texture throughout.
- Whip the filling:
- In a separate bowl, beat the softened cream cheese, powdered sugar, and vanilla together until completely smooth and lump-free.
- Bring it all together:
- Pour the cream cheese mixture over the crumbs and mix with your hands or a spoon until everything holds together like a soft dough.
- Roll into balls:
- Scoop about one tablespoon at a time and roll firmly between your palms, placing each ball on a parchment-lined tray as you go.
- Chill thoroughly:
- Refrigerate the tray for at least one hour so the balls firm up enough to handle without falling apart during dipping.
- Melt the chocolate:
- Use a microwave in short bursts or a double boiler, stirring gently until the chocolate is silky and completely smooth.
- Dip and coat:
- Drop each chilled ball into the melted chocolate, roll it to cover completely, lift it out with a fork, and tap off the excess before returning it to the parchment.
- Decorate while wet:
- Sprinkle crumbs or sprinkles over the coated balls immediately before the chocolate sets, working quickly in small batches.
- Let them set:
- Leave the tray at room temperature or pop it back in the fridge until the coating is firm and dry to the touch.
 Pin It
 Somewhere between the third and fourth batch I made, these stopped being a recipe and started being my signature contribution to every gathering. People now text me ahead of parties asking if the red velvet balls are coming, which feels like the highest compliment a home cook can receive.
Choosing Your Chocolate Coating
White chocolate gives the classic look and a sweeter finish, but dark chocolate creates a beautiful contrast against the red interior that surprises people when they bite in. Semisweet lands somewhere in the middle and is probably the safest bet if you are serving a crowd with mixed preferences. Whatever you choose, avoid cheap baking chips because they contain stabilizers that make melting uneven and coating frustrating.
Storing and Making Ahead
These keep beautifully in an airtight container in the refrigerator for up to five days, and the flavor actually improves after the first day as everything melds together. You can also freeze them for up to a month by layering between sheets of parchment in a sealed container, then thaw in the fridge before serving.
Fun Variations to Try
Once you have the basic technique down, the flavor possibilities open up in every direction. Try rolling the finished balls in crushed pistachios, toasted coconut, or even crushed graham crackers for a cheesecake vibe.
- Add a tablespoon of espresso powder to the cream cheese filling for a mocha twist.
- Swap the red velvet cake for chocolate or vanilla and adjust the food coloring to match a holiday theme.
- Always taste the mixture before rolling so you can adjust sweetness or add a pinch of salt to balance it out.
 Pin It
 These little bites carry a kind of joy that is hard to explain until you watch someone pop one in their mouth and immediately reach for another. That is really all the proof you need.
Recipe Q&A
- → How do I keep the balls from falling apart when dipping?
-
Ensure the mixture is well chilled and firm before dipping. If too soft, add a touch more cake crumbs or extra chill time. Work quickly with chilled trays and handle one ball at a time to maintain structure.
- → What's the best way to melt the chocolate?
-
Melt gently over a double boiler or in short bursts in the microwave, stirring between intervals until smooth. Avoid overheating; add a teaspoon of neutral oil if needed for a thinner coating.
- → Can I use store-bought cake or leftovers?
-
Yes—fully baked, cooled red velvet cake works well. Dry or day-old cake crumbs actually bind better with the cheesecake mixture than very moist crumbs.
- → How long should I chill the balls before coating?
-
Chill for at least 1 hour, or until firm to the touch. Longer chilling helps them hold shape during dipping and improves coating adhesion.
- → How should I store the finished balls?
-
Place in an airtight container and refrigerate for up to five days. Separate layers with parchment to prevent sticking and return to cool before serving.
- → Any suggestions for variations or decorations?
-
Use dark or milk chocolate for a different flavor, fold in chopped nuts or shredded coconut into the filling, or top with cake crumbs, sprinkles, or a drizzle of contrasting chocolate.
