 Pin It
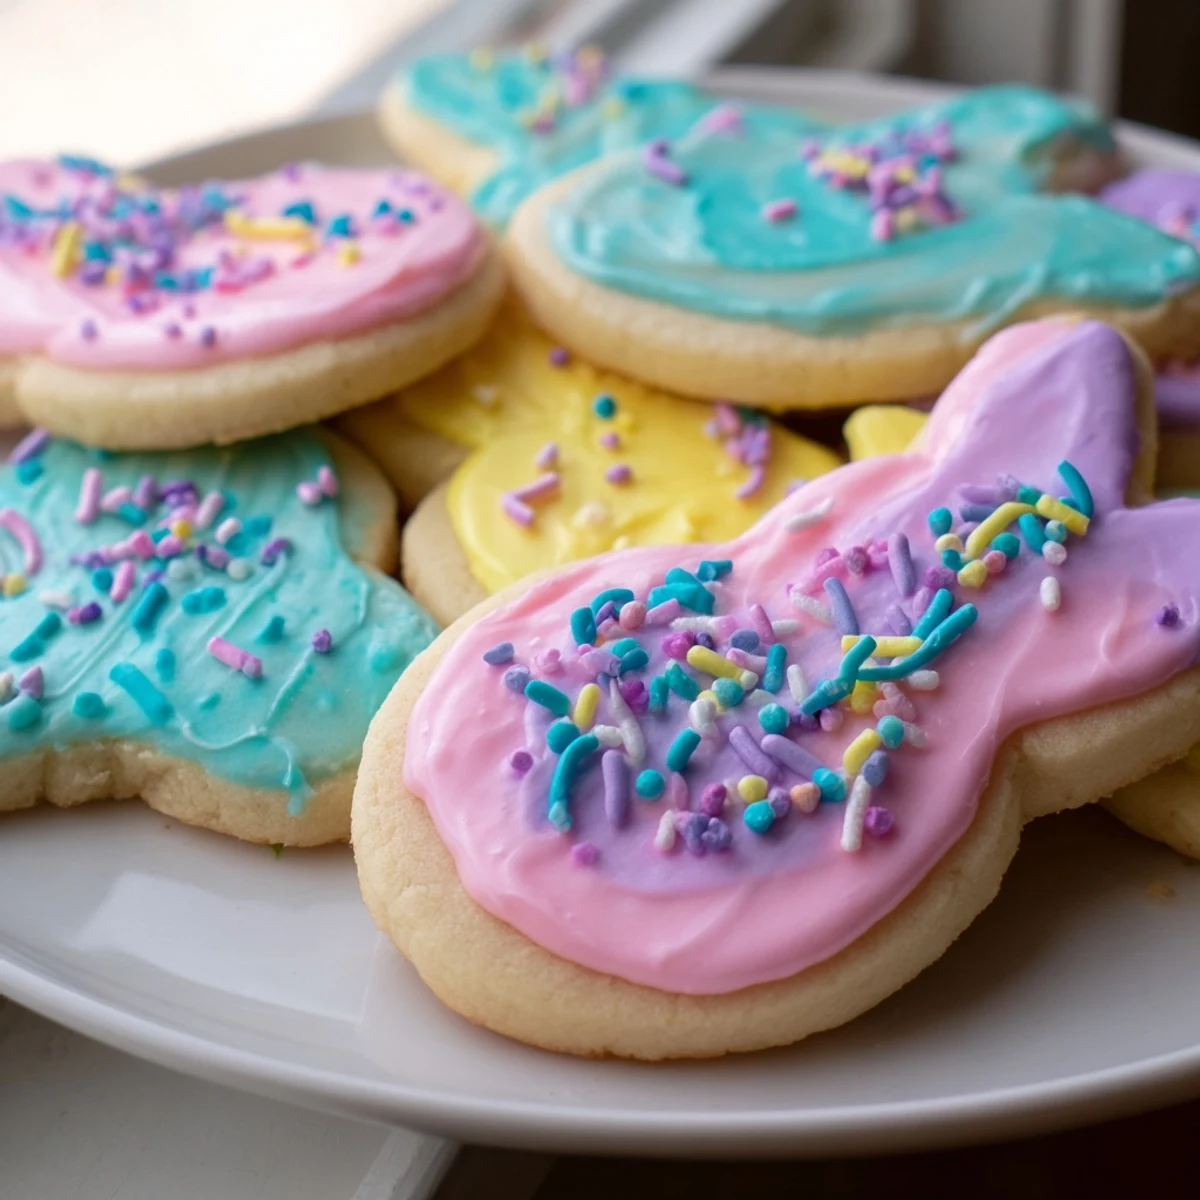
 These delightful Easter cookies feature a classic buttery sugar cookie base that's soft, tender, and perfect for cutting into festive shapes. The dough comes together quickly and requires chilling for easy rolling. After baking to golden perfection, decorate with smooth royal icing in assorted pastel shades topped with colorful sprinkles. Each bite delivers melt-in-your-mouth sweetness with just the right balance of vanilla. Great for baking with kids, these decorated treats store well for up to a week and bring cheerful homemade charm to any spring gathering.
Last year my youngest grabbed a handful of sprinkles and dumped them directly onto an unfrosted cookie, declaring it a spring garden. That happy mess became the inspiration for our annual Easter cookie decorating marathon. Now every April we clear the kitchen table, roll out dough dusted with flour like snow, and let everyone create their own edible art.
I learned the hard way that royal icing consistency matters more than I thought. My first batch looked beautiful but never quite set, leaving smudges on everything they touched. Now I keep adding liquid one teaspoon at a time until the icing falls off the whisk in a slow ribbon that disappears back into itself within ten seconds.
Ingredients
- 2 1/2 cups all-purpose flour: Sifted lightly to prevent clumps and ensure even mixing with the leavening agents
- 1/2 teaspoon baking powder: Just enough to give these cookies a gentle lift without making them cakey
- 1/4 teaspoon salt: Balances the sweetness and enhances vanilla flavor
- 3/4 cup unsalted butter: Room temperature butter creams properly and creates that melt in your mouth texture
- 1 cup granulated sugar: Creamed with butter to create tiny air pockets that make cookies tender
- 1 large egg: Binds everything together and adds structure
- 2 teaspoons pure vanilla extract: Do not skimp here because vanilla is the backbone of flavor
- 2 cups powdered sugar: Sifted to guarantee smooth royal icing without lumps
- 1 1/2 to 2 tablespoons milk or water: Start with less and add more until you reach the right flooding consistency
- 1 tablespoon light corn syrup: The secret ingredient that gives icing that beautiful glossy finish
- 1/2 teaspoon vanilla or almond extract: Almond adds a lovely sophisticated note that pairs beautifully with spring flavors
- Food coloring: Gel colors work best and produce vibrant pastels without thinning your icing
- Sprinkles and decorations: Add these immediately after icing before it starts to set
Instructions
- Whisk the dry ingredients:
- Combine flour, baking powder, and salt in a medium bowl. Set aside while you cream the butter.
- Cream butter and sugar:
- Beat butter and sugar on medium high speed for 2 to 3 minutes until pale and fluffy. Scrape down the bowl halfway through.
- Add egg and vanilla:
- Beat in the egg and vanilla until fully incorporated. The mixture should look smooth and glossy.
- Mix in the flour:
- Gradually add dry ingredients on low speed, mixing just until combined. Do not overmix or cookies will be tough.
- Chill the dough:
- Divide dough in half, form into disks, wrap tightly, and refrigerate for at least 30 minutes. This prevents spreading during baking.
- Prep for baking:
- Preheat oven to 350°F and line baking sheets with parchment paper.
- Roll and cut:
- Roll dough to 1/4 inch thickness on a floured surface. Cut shapes and transfer to prepared sheets 1 inch apart.
- Bake until set:
- Bake for 8 to 10 minutes until edges are firm but not browned. They will finish cooking on the hot pan.
- Cool completely:
- Let cookies rest on baking sheets for 5 minutes then move to wire racks. Decorating warm cookies will melt your icing.
- Make the royal icing:
- Whisk powdered sugar, liquid, corn syrup, and extract until smooth. Adjust consistency as needed.
- Decorate your cookies:
- Tint icing with gel colors, pipe or spread onto cooled cookies, and add sprinkles while wet. Let dry fully before stacking.
 Pin It
 My daughter now insists on making a batch of naturally green icing every year using spinach juice. It started as a joke but actually tastes neutral and looks gorgeous. Sometimes the best discoveries come from experiments.
Getting the Perfect Icing Consistency
Flooding consistency should run off a spoon and smooth out within 15 seconds. Outline icing needs to be stiffer so it holds its shape like a little wall. Make both from one batch by starting thick and reserving some before thinning the rest.
Decorating with Kids
Set up decorating stations with squeeze bottles of pre colored icing and bowls of sprinkles. Disposable piping bags work wonders for little hands. Accept the chaos because memory making always beats picture perfect cookies.
Storage and Sharing
Once icing is completely hard which takes at least 4 to 6 hours, layer cookies between parchment in airtight containers. They stay fresh for a week but usually disappear much faster.
- Package individual cookies in clear bags tied with pastel ribbon for Easter basket gifts
- Freeze undecorated baked cookies for up to 3 months and thaw before decorating
- Keep decorated cookies away from humidity or the icing will soften and lose its crisp edges
 Pin It
 These cookies have become the centerpiece of our Easter celebration. Hope they bring as much joy to your table as they have to ours.
Recipe Q&A
- → How long should I chill the cookie dough?
-
Chill the dough for at least 30 minutes after dividing and flattening into disks. This helps firm the butter, prevents spreading during baking, and makes rolling easier. You can chill overnight for better flavor development.
- → What's the best way to achieve smooth royal icing?
-
Sift powdered sugar before mixing to prevent lumps. Start with 1 1/2 tablespoons of liquid and adjust gradually until you reach pipeable consistency. The corn syrup helps create smooth, glossy icing that sets beautifully without becoming too hard.
- → Can I make these cookies ahead of time?
-
Absolutely! You can prepare and chill the dough up to 2 days before baking. Baked cookies (undecorated) freeze well for up to 3 months. Once decorated with royal icing, store in an airtight container at room temperature for up to 1 week.
- → How do I know when the cookies are done baking?
-
The cookies are ready when edges are set and slightly firm but centers still look soft—about 8-10 minutes at 350°F. They shouldn't brown much; a very light golden bottom indicates perfect doneness. They'll continue firming as they cool.
- → What Easter shapes work best for these cookies?
-
Classic Easter cutters like eggs, bunnies, chicks, flowers, and butterflies work wonderfully. Simple shapes with clean edges decorate easiest. Consider crosses, lambs, or carrots for traditional themes. Use 2-3 inch cutters for ideal portion sizes.
- → How can I add extra flavor to the cookies?
-
Try adding lemon or orange zest to the dough for bright citrus notes. Almond extract instead of vanilla creates a classic pairing. For the icing, flavor with almond, lemon, or coconut extract. You can also tint icing with natural fruit juices for subtle color and flavor.
