 Pin It
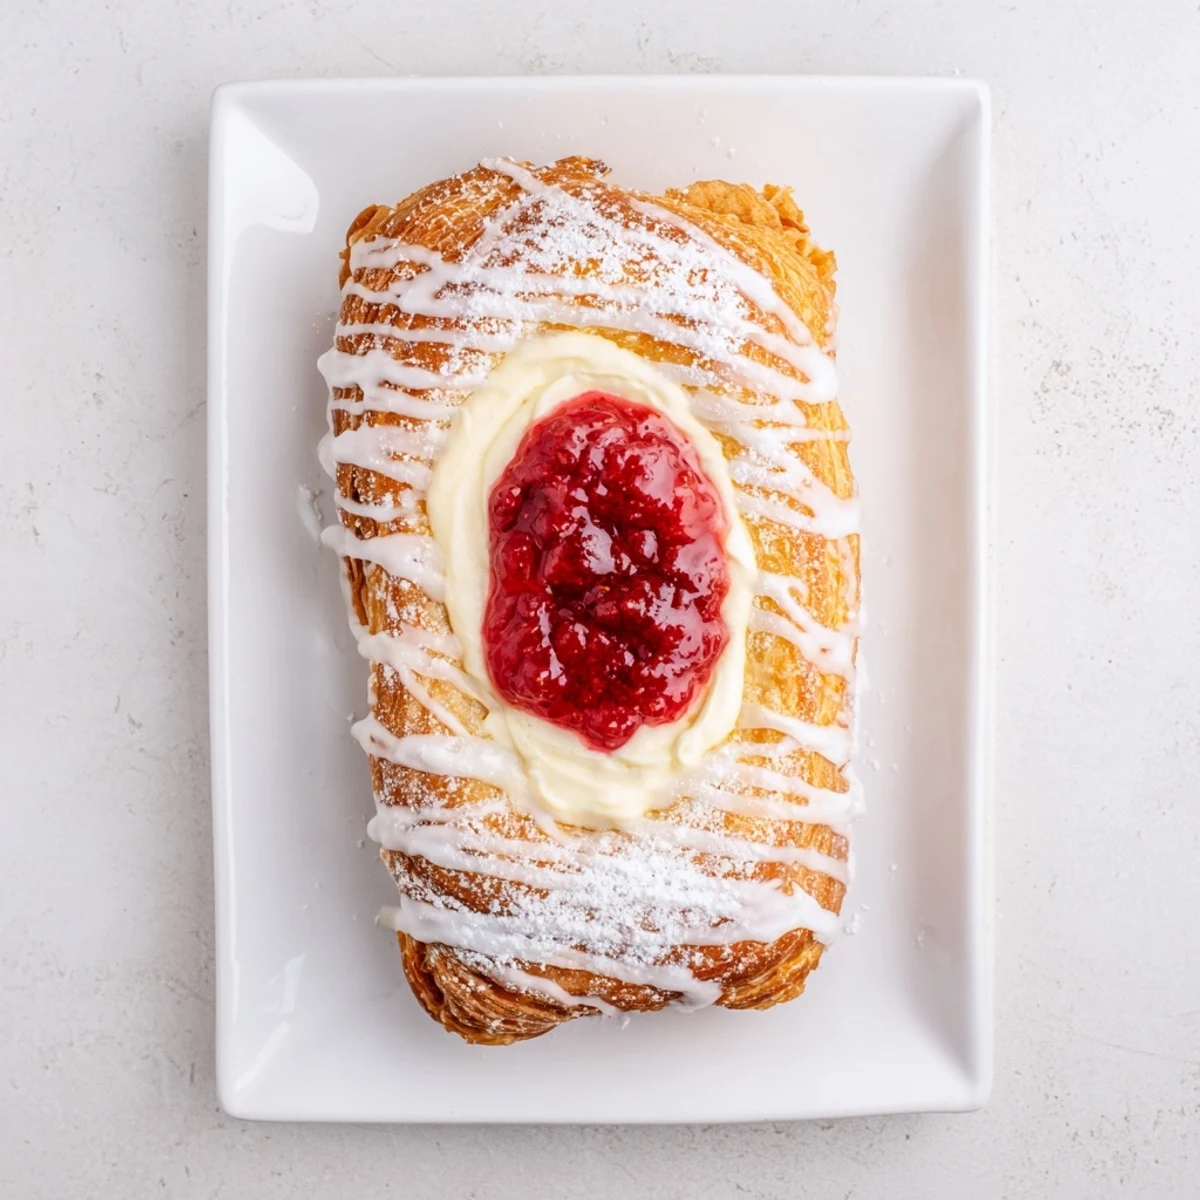
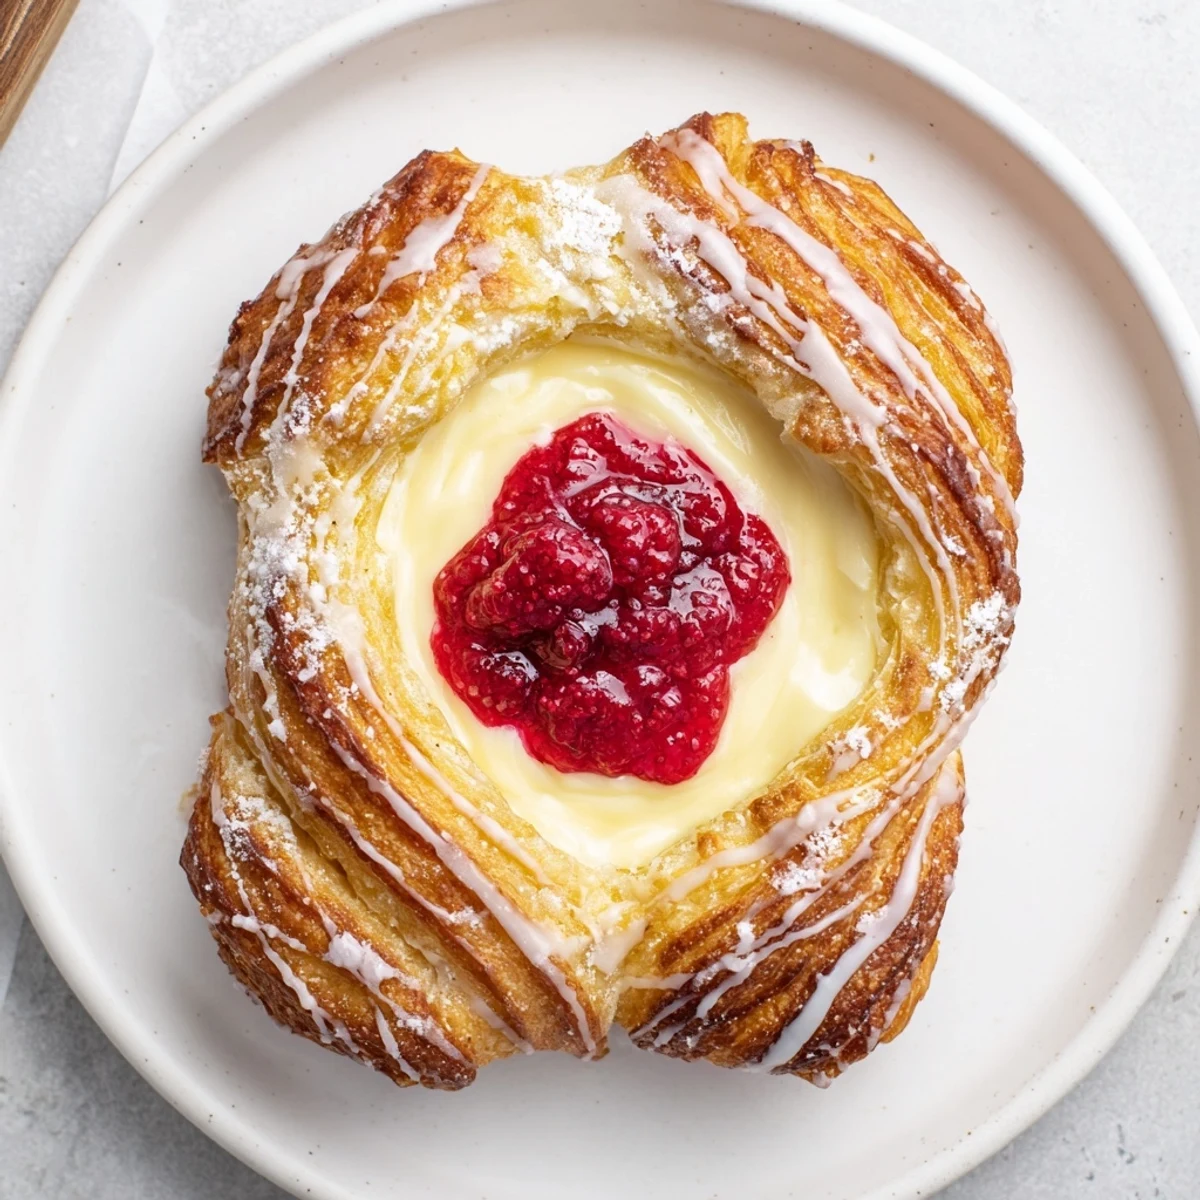
 These buttery pastries cleverly use unfed sourdough starter to create a tender, flaky dough that's wrapped around two luxurious fillings. The first layer blends softened cream cheese with vanilla and bright lemon juice, while the topping features fresh raspberries simmered into a thick, jewel-like compote. After chilling the dough for proper texture, each pastry is hand-shaped, filled generously, then baked until golden. A simple vanilla glaze adds the finishing touch to these stunning breakfast treats that taste even better than they look.
There is something magical about turning what would otherwise be waste into something people beg you to make again. These danishes started as a Sunday morning experiment when my sourdough starter had been fed far too much during a particularly enthusiastic baking phase. The way the kitchen smelled that morning — butter hitting hot raspberries, vanilla wrapping around everything like a warm blanket — convinced me this recipe deserved a permanent spot in my rotation.
I brought a batch to a friend's brunch last spring, and honestly, I was a little nervous they would not hold up against the store bought pastries someone else brought. Within five minutes, mine were gone and people were actually asking if I had a secret baking background I had been hiding from them. The best part was watching my friend's normally picky seven year old reach for seconds with cream cheese smeared across her chin.
Ingredients
- 1/2 cup (120g) unsalted butter, chilled and cubed: Keep this ice cold because the contrast between flaky layers and soft dough is what makes these feel special
- 1 cup (120g) all purpose flour: Regular flour works perfectly here, no need to hunt down anything fancy
- 1/2 cup (120g) sourdough discard (unfed): Use whatever consistency your discard happens to be, the recipe forgives all variations
- 1 tablespoon granulated sugar: Just enough to help the dough brown without making it sweet
- 1/4 teaspoon salt: Essential for balancing all that cream cheese richness
- 1 large egg, beaten (for egg wash): The difference between pasty dough and golden, bakery worthy edges
- 6 oz (170g) cream cheese, softened: Let this sit on the counter for at least an hour so you avoid any lumpy surprises
- 1/4 cup (50g) granulated sugar: Adjust this slightly depending on how sweet your raspberries are
- 1 teaspoon vanilla extract: Use the good stuff here since there are so few ingredients
- 1 tablespoon lemon juice: Fresh squeezed makes such a difference in brightening the filling
- 1 cup (125g) fresh or frozen raspberries: Frozen work beautifully in winter when fresh ones taste like disappointment
- 2 tablespoons granulated sugar: Tweak based on berry sweetness and your personal preference
- 2 teaspoons cornstarch: This is what transforms juicy berries into a proper filling instead of a running mess
- 1 tablespoon lemon juice: Adds brightness and helps the cornstarch work its magic
- 1/2 cup (60g) powdered sugar: Sift this first or your glaze will have stubborn lumps
- 1-2 tablespoons milk or cream: Start with one tablespoon and add more until you reach the perfect drizzling consistency
- 1/4 teaspoon vanilla extract: The finish that makes these taste professionally made
Instructions
- Make the dough base:
- Cut that cold butter into your flour until you see pieces the size of small peas, then mix in your sourdough discard, sugar, and salt until everything just comes together into a soft dough that holds its shape when you squeeze it.
- Chill the dough:
- Shape the dough into a disk, wrap it tightly in plastic, and let it rest in the refrigerator for at least one hour because this step is what prevents the danishes from spreading into sad, flat puddles in the oven.
- Prepare the cream cheese filling:
- Beat the softened cream cheese until it is completely smooth with no lumps remaining, then add the sugar, vanilla, and lemon juice until everything is creamy and combined.
- Cook the raspberry filling:
- Combine the raspberries, sugar, cornstarch, and lemon juice in a small saucepan over medium heat, stirring constantly until the mixture bubbles and thickens into something that coats the back of a spoon, about three to five minutes.
- Get ready to bake:
- Preheat your oven to 375°F (190°C) and line a baking sheet with parchment paper because cleaning burned sugar off bakeware is nobody's idea of a good time.
- Roll and cut the dough:
- On a lightly floured surface, roll out your chilled dough to about 1/4 inch thick and cut it into eight rectangles or circles, whatever shape makes you happiest when you look at them.
- Assemble the pastries:
- Use your fingers or the back of a spoon to create a gentle indentation in the center of each piece, then spoon about one tablespoon of cream cheese filling into each well and top with a spoonful of that gorgeous raspberry mixture.
- Let them rest:
- Set the assembled pastries aside at room temperature for twenty to thirty minutes so the dough can relax and puff slightly in the oven, which creates those lovely layers everyone loves.
- Add the egg wash:
- Brush just the edges of each danish lightly with beaten egg, being careful not to let it drip down the sides or it will seal the layers together and they will not puff properly.
- Bake until golden:
- Bake for twenty to twenty five minutes until the edges are deeply golden and the centers are set, then cool them completely on a wire rack because the filling needs time to firm up.
- Make the glaze:
- Whisk together the powdered sugar, milk, and vanilla until completely smooth, then drizzle it over the cooled danishes in that casual way that looks like you did it without even trying.
 Pin It
 My grandmother always said that pastries were how you showed love without saying a word, and I understand that better now than I did when I was small and just wanted to eat whatever she had made. These danishes have become my way of saying I care, whether it is for a new neighbor, a sad friend, or just myself on a random Tuesday that needs a little brightening.
Making These Your Own
Once you have made these a few times, you will start seeing possibilities everywhere. Swap the raspberries for whatever fruit is in season or whatever you have lingering in your freezer, though I have found that blueberries need an extra minute of cooking time and strawberries really benefit from a pinch of extra cornstarch since they release so much liquid.
The Sourdough Secret
Using sourdough discard instead of just flour adds this incredible depth of flavor that people notice but cannot quite put their finger on. The tang becomes more pronounced the longer your discard has been in the refrigerator, so feed your starter the day before you want to make these for the most complex flavor profile.
Timing Everything Right
The most common mistake is rushing the chilling steps, but I have learned that good things really do come to those who wait. I like to make the dough and both fillings the night before, then just assemble and bake in the morning, which makes me feel incredibly organized and leaves me with more time to drink my coffee while the oven does all the work.
- Set out your cream cheese an hour before you plan to start mixing anything
- If your kitchen is warm, work quickly and keep returning the dough to the refrigerator
- The glaze can be made up to two days ahead and stored in an airtight container at room temperature
 Pin It
 There is something deeply satisfying about turning sourdough discard into something this beautiful and delicious, like you have discovered a secret that only serious bakers know. Make these once and they will become your go to for every occasion that calls for something special but not fussy.
Recipe Q&A
- → Can I use active sourdough starter instead of discard?
-
Yes, you can use active sourdough starter, though the texture may be slightly tangier. Reduce any added liquid in the dough by about a tablespoon to compensate for the higher hydration in active starter compared to discard.
- → What other fruits work well in these pastries?
-
Blueberries, strawberries, blackberries, or sliced stone fruits like peaches and plums all work beautifully. Simply cook them down with sugar and cornstarch following the same method as the raspberry filling.
- → How long can I store these danishes?
-
Keep them in an airtight container at room temperature for up to 2 days. For longer storage, refrigerate for up to 5 days, though they're best enjoyed fresh. You can also freeze unbaked pastries and bake them straight from the freezer, adding a few extra minutes to the baking time.
- → Why does my dough need to chill for an hour?
-
Chilling allows the butter to firm up and the gluten to relax, which prevents the dough from shrinking when rolled out. This step is crucial for achieving those characteristic flaky layers that separate during baking.
- → Can I make these without a stand mixer?
-
Absolutely. Use a pastry cutter, two forks, or your fingers to work the cold butter into the flour until you achieve coarse crumbs. For the cream cheese filling, a simple bowl and whisk work perfectly—the softened cheese mixes easily by hand.
- → What's the purpose of the proofing rest before baking?
-
The 20-30 minute room temperature rest lets the chilled dough relax slightly, which helps the pastries puff more evenly in the oven. It also takes the chill off the butter, creating steam that contributes to those beautiful flaky layers.
